|
|
|
|
|
|
|
Title (Europe) Sonic Labyrinth Title (Japan) ソニックラビリンス Title (USA) Sonic Labyrinth Developer SIMS & Minato Giken Platform Sega Game Gear Format 4M cartridge Genre Action Rating CERO: 全年齢 ESRB: K-A |
|
|
|
Europe October, 1995 Japan November 17, 1995 ź3,800 USA November, 1995 |
|
|
|
Directors Noburo Machida Hideki Katagiri Planner Kazuhiro Tanaka Programmers Ken'ichi Iwanaga Y. Kataoka Akira Inoue Takashi Ueshima Designers Keiko Kayajima Kazuhiro Tanaka Keiko Tamura Sound Programmer Atsuko Iwanaga |
|
|
|
Sega Game Gear Sonic Labyrinth Sony PlayStation 2 Sonic Mega Collection Plus Nintendo GameCube Sonic Adventure DX Microsoft Xbox Sonic Mega Collection Plus
Windows PC |
|
Last update: 09/25/06
:: Quick Jump ::
Later that very day, Sonic awakens from his afternoon nap and slips on his red sneakers as usual. Only something doesn't feel quite right: the shoes are abnormally heavy. So heavy, in fact, that Sonic quickly discovers he cannot run or jump. Struggle as he might, Sonic is unable to remove the freaky footwear, but upon closer examination notices Eggman's insignia on the bottom. Cursing his carelessness, Sonic's attention is drawn to the booming laughter of Dr. Eggman, who proudly explains that his new Speed Down Boots can only be removed with Chaos Emerald power, the same power that created them. And the Emeralds are all hidden away in Eggman's new stronghold, the great labyrinth, an obstacle course Sonic cannot possibly hope to navigate without his trademark speed. South Island suddenly echoes with the sound of large machines: construction has already begun on Eggmanland, the bad Doc's new base of operations. Now our hedgehog hero finds himself in a difficult situation. Tails had departed on his own solo journey some days prior, so there are no sidekicks around to save the day. Running and jumping are impossible... but not rolling! Equipped with nothing but his trademark spin, Sonic enters Eggman's great labyrinth to take back the Chaos Emeralds and his namesake speed.
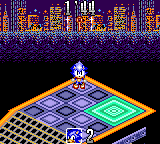
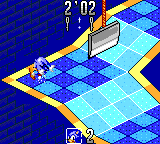
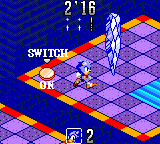
The goal is to locate the 3 Keys hidden on each board then reach the exit within the time limit. Sonic's movement can be controlled with the D-pad, but his basic walk is more like a trudge - a hopeless tactic against the oppressive countdown. The only way to get Sonic around fast enough to stand a chance against the clock is to slingshot him from A to B with the Rolling Attack (the Spin Dash, basically, though it isn't referred to as such). Press and hold button 1 or 2 to have Sonic rev up, and alter his trajectory with the D-pad. Arrows just overhead denote the speed of the dash: more notches mean more speed. When the power gauge is at the desired level, release button 1/2 to have Sonic dash off with a high speed Rolling Attack. Press button 1 or 2 while rolling to have Sonic screech to a halt and revert to his more maneuverable standing posture. Barring Scroll Zones (see below), there are no Rings and no power bars: if Sonic takes damage by walking into an enemy or spike trap, 10 seconds are shaved off the timer. If the timer hits 0, Sonic loses a life and restarts the stage. Precious seconds can be added to the clock by busting enemies and collecting Keys: each bopped baddie adds 5 seconds to the countdown while pilfering a Key tacks on a comforting 30. Items on each board are pretty sparse, mainly consisting of bumpers, flippers, and other pinbally doodads. Power-up items appear as randomly shifting clusters of triangles: once the formation you're after appears, grab it quickly before it morphs into something else.
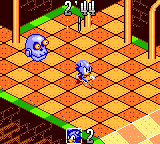
Enemies can be destroyed with the customary Rolling Attack for a 5 second bonus on the countdown. Occasionally, a bot can be found carrying a Key on its noggin: destroy the baddie to get the booty.
Eggman's great labyrinth consists of 4 Zones each divided into 4 rounds. The 4th round of each Zone is a so-called Scroll Zone (スクロールゾーン), in which Sonic plummets at dangerous speeds down a long, narrow slide. Maneuver Sonic into 100 Rings on his descent to score a 1up. Smack into an obstacle (such as a glass window or puffy cloud) to slow down, but avoid spikes which rob Sonic of all collected Rings. At the end of each rolling course, Sonic faces the area boss. In the boss round, there is no timer: Sonic uses Rings collected in the Scroll Zone for their customary purpose, but note that once damage has been sustained, lost Rings cannot be retrieved. At the end of each round, Sonic's score is tallied with bonus points awarded for seconds left on the clock (your speed is calculated in kilometers per hour). At the end of the game (either through completion or Game Over), your completion time and score is added up with a star rating from 1-5. The star rating is just to abase you, but the best time and score are recorded for all to see.
Sonic is awarded a Chaos Emerald after defeating each boss, and Eggman drops the fifth while escaping after the final battle. That still leaves one Emerald unaccounted for: clear the game without it and you'll get the bad ending along with a cryptic hint as to where the missing gem may be found. In Zone 2-3 on the lower right edge of the board you may notice a closed door marked "BONUS". To get inside, hop into the cannon found on the lower left hand corner of the stage: while in the cannon, press and hold right on the D-pad along with buttons 1 and 2 simultaneously. Continue holding until the cannon fires and Sonic gets dropped onto a secret platform with the switch for the bonus door. The bonus stage is a wide open board with plenty of bumpers and a dozen Rings. The goal is to bounce around and grab as much loot as you can within the scant 30 second time limit. Each Ring on the board is worth a full 25: grab 4 to earn a 1up. When your time is up (or if you fall over the edge), you're ejected back into Zone 2-3. Note that while you never actually see the last Chaos Emerald, it's automatically added to your stock regardless of how many Rings you managed to nab in the bonus stage. Clear the game with all 6 Emeralds to view the good ending and receive the level select code.
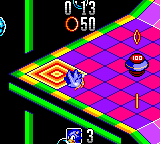
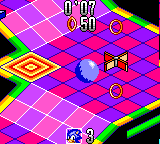 From the options menu, players may choose the number of lives Sonic begins the game with: 3 is default, but the number can be set to anything between 1 and 10. The control setup can be toggled between straight (Sonic controls normally) or slant (the cardinal directions on the D-pad act as diagonals, facilitating somewhat smoother movement if you can adjust to it). Also in the menu is the Time Attack, a race against the clock through a variation of Zone 1-2. The best time and score are recorded, and along with the standard star rating you're also given a 5-digit password. The password has no use in the context of the game, but was actually for entry into a contest held by Sega of Japan between November 17 and December 31, 1995. The contest was only open to Japanese players with some miscellaneous Sonic swag given away as prizes to the top 100 contestants.                     .
The word "Select" should appear. Now go to the options menu. The sound test is replaced with a level select. .
The word "Select" should appear. Now go to the options menu. The sound test is replaced with a level select.
Written content and original graphics copyright ® 1997-2009 Jared Matte. Hosting and administration thanks to Nathan Tsui. Sonic the Hedgehog characters, logos, and images are trademarks of SEGA Corporation. The GHZ is an independent fansite and is not affiliated with SEGA Corporation. |


