|
Notice: This page is out-of-date and is no longer being maintained. Some of the information may be erroneous and the writing may
be embarrassingly bad. Proceed at your own risk.
|
-- Quick Jump --
[Story |
Gameplay Info |
Stages |
Comparison |
Codes |
Behind the Screens |
Cultural Notes |
Miscellanea]
-- Story --
Faced with the imminent destruction of Coral, the home world, humankind forms a desperate plan: find some
new digs. Dubbed the "Pioneer Project," the grand-scale immigration plan began with the search for a suitable home.
Unmanned probes were sent out to give space a thorough feeling up, and sho 'nuff, a potential pad is discovered. The first
wave of colonists, consisting almost entirely of scientists, ships out on the Pioneer 1 to humanity's future home: planet
Ragol. The crew of Pioneer 1 bust out their things and proceed to make themselves at home. The first line of business is
to establish the Central Dome, where the rest of humanity will eventually make contact with their new home.
Seven years later, the main wave of refugees sets out for Ragol, which the crew of Pioneer 1 should've
made nice and comfy by now. Transportation comes in the form of Pioneer 2, a grand-scale immigration ship comprised of
large clusters of smaller shuttles. All seems to be going smoothly as Pioneer 2 enters the orbit of Ragol, until a
communications link is attempted with the Central Dome. A massive explosion on the planet severs the communication, and
all contact with the thousands of men and women on Ragol is lost. Enter the Hunters...
Hunters are basically mercenaries who will take all forms of odd jobs for Meseta. They are fighters
skilled in one or more of three basic forms of combat: swords and other melee weapons (Hunters), guns and long-distance
weapons (Rangers), or magic spells known as Techniques (Forces). Hunters exist of all three races: Humans, Newmans
(elf-like humans with additional powers created through biogenetic engineering), and Androids (also known as "Casts").
Fortunately for the citizens of Pioneer 2, there are plenty of Hunters aboard the ship, and they've been commissioned by
the Principal to get down and dirty on Ragol and find out just what the heck happened.
This is where you, in the role of a Hunter of your creation, step in and start playing. As you explore
Ragol, you'll discover numerous message capsules left by Rico Tyrell (aka "Red Ring Rico") a scientist aboard Pioneer 1.
Rico, daughter of Pioneer 2's Principal Colin Tyrell, was brilliant, vivacious, and very popular among her peers. While
studying the fauna of Ragol, she began to notice all was not well in mudville. The animals started behaving strangely, and
Rico decided to get to the bottom of it. As you follow Rico's footsteps through Ragol, her discovery logs sprinkled around
the land piece the mystery together bit by bit, and it's not good news...
Ragol, it seems, is the living coffin of a horrible being with incredible powers. Known as Dark Falz,
this evil entity was last cut loose upon society an unknown number of years prior. While the last combatants could not
defeat Dark Falz, they did manage to seal him away in the depths of this placid planet -- and the colonists of Pioneer 1
disturbed his slumber. He's pretty cranky now, and guess whose job it is to erase ol' Falz from the picture so that
humanity can move in to its new pad? Fortunately, You're Not the Only Hero...
-- Gameplay Info --
Console gaming's first network RPG is admittedly a bit on the simple side. The closest possible
comparison is Blizzard's Diablo series, except from a third-person perspective. It also owes some elements to Nintendo's
Zelda series, but at the end of the day, where PSO stands out is in the way you interact with other players. Traditional
PC network RPGs are almost invariably competitive, whereas the very substance of PSO is teaming up and working together to
achieve things that would be impossible on your own. For example, say you're a level 45 FOnewm who wants to try fighting
Dark Falz on Very Hard mode: alone, you wouldn't last two minutes, but if you team up with your HUmar, RAcast, and FOmarl
buddies the four of you might just stand a fighting chance.
Your first line of business is to create a character. The PSO world consists of two genders (male and
female), three races (Humans, Newmans, Androids), and three combat types (Hunters, Rangers, Forces). Males typically have
more attack power, whereas females have stronger defense. Humans are well-balanced characters who are adept in both
weapons combat and Techniques; Newmans are biogenetically engineered humans who tend to be stronger in Technique abilities
but weaker in melee combat; and Androids are purely robotic beings who have strong combat abilities and a natural defense
against traps and status ailments, but cannot use Techniques at all. Hunters excel in melee combat, with swords being
their weapon of choice; Rangers work better from a distance with long-range weapons such as guns; and Forces specialize in
Techniques. The 9 different character types are as follows:
HUmar
Class: Hunter
Race: Human
Gender: Male
Arguably the most well-rounded class in the game, HUmars are the best selection for those
hoping to be a jack-of-all-trades, master-of-none. With a solid balance between Attack and
Defense not to mention a respectable versing in Techniques, HUmars are the everyman's character
aimed at beginners.
|
HUnewearl
Class: Hunter
Race: Newman
Gender: Female
HUnewearls are like HUmars with a preventative medicine philosophy: while they're relatively
weak for a Hunter, they have the highest Defense and Evasion percentages of any class. They
also have the strongest Mental ability of any non-Force character. But the real catch is that,
in the tradition of PS hotties Nei and Rika, they wear less clothes than any other class.
Schwing!
|
HUcast
Class: Hunter
Race: Android
Gender: Male
Every bit as wicked as they look, HUcasts have the highest Attack percentage and HP tally of
any class. With strong Evasion and Accuracy, they're the stupid man's selection because
they're about the easiest character to play as. Just hack & slash. Techniques are but a dream
for Androids.
|
RAmar
Class: Ranger
Race: Human
Gender: Male
RAmars have the lowest Attack and Accuracy of the Ranger class, and the lowest MST and TP
percentages of any non-Android class... but of the Rangers, they're the only ones who
can use Techniques at all, making them the most well-rounded in their area of expertise.
|
RAcast
Class: Ranger
Race: Android
Gender: Male
These guys have the strongest Attack and Defense of the Ranger class, but as with all Androids,
are incapable of using Techniques. Besides that, they just look plain lame. If you're
a RAcast player: hahaaa! I laugh at you.
|
RAcaseal
Class: Ranger
Race: Android
Gender: Female
These mecha cuties have the highest Accuracy of their class, a very important assett for
Rangers. They also have a good Evasion percentage, but like all Androids, cannot use
Techniques. My only curiosity is just how anatomical they are...
|
FOnewearl
Class: Force
Race: Newman
Gender: Female
While their Mental power is not quite as strong as their male counterparts, FOnewearls have
superior Defense and Evasion. Moreover, they come in all shapes and sizes and are absolutely as
cute as the button nose on a pink teddy bear. Mm-mm, good!
|
FOmarl
Class: Force
Race: Human
Gender: Female
As RAmars are to the Ranger class, FOmarls are to the Force class. While her Mental and TP
percentages aren't as high as her Newman counterparts, FOmarls are much more adept at melee
combat, making them the most well-rounded of the Forces. And speaking of round, they have the
wickedest set of curves of any class, and they're covered up from head to toe! What the hell?!
|
FOnewm
Class: Force
Race: Newman
Gender: Male
The absolute strongest spellcasters in the game, FOnewms excel in Mental and TP percentages.
They have the lowest Defense of any class, though, but it doesn't matter because they just look
bitchin' COOL. Incidentally, FOnewm is my class of choice. Let's sing together, fellow
FOnewms! We're too sexy for ourselves, too sexy for...
|
The main thing to consider when choosing a character (aside from looks) are the stats. There are eight
different attributes that determine how your character plays: ATP (attacking power), DFP (defense power), MST (Technique
strength), ATA (accuracy rate of attacks), EVP (evasion rate), LCK (luck), HP (health points), and TP (Technique points).
Each class has its own strengths and weaknesses in various areas, so character choice should be made on how you intend to
play. Once you've chosen your class, you can customize the appearance of your character with a plethora of options: face,
skin color, hair style, hair color, costume, height & proportions (yeah, you can make a fatty or a stringbean), and of
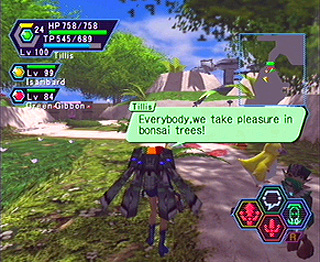
course name. Have fun, but don't think you'll ever be able to create a character as cool and kick-ass as my own FOnewm,
Green Gibbon.
Upon creating your character, you're assigned a Section ID which is chosen via a top secret formula based
on the letters in the name of your character. Your Section ID will subtly affect many different aspects of the game,
although it mostly boils down to what types of treasures you'll encounter and the frequency with which they appear. Mag
evolution is based partially on Section ID, as are the types of items you'll find on sale in the Shopping District.
Additionally, each Section ID has its own unique Tekker, who specializes in one particular area. Here's a rundown of the
IDs and their individual attributes:

|
Viridia -- Shots and Partisans appear often; Slicers are rare.
|

|
Greenill -- Rifles and Daggers appear often; Swords are rare.
|

|
Skyly -- Swords and Rifles appear often; Mechguns are rare.
|

|
Bluefull -- Partisans and Rods appear often; Wands are rare.
|

|
Purplenum -- Mechguns and Daggers appear often; Swords and Partisans are scarce.
|

|
Pinkal -- Wands, Partisans, and high level Technique Disks appear often; Rifles are rare.
|

|
Redria -- Slicers, Shots, and strong Armor & Shields appear often; Daggers are rare.
|

|
Oran -- Daggers, Wands, and Swords appear often; Rods are rare.
|

|
Yellowboze -- Higher amounts of Meseta appear; all other items appear with normal
frequency.
|

|
Whitill -- Slicers and Mechguns appear often; Shots are rare.
|
Once you've got your character set up, you're ready to get down and dirty on Ragol. You can choose to
play either Online or Offline. The only benefits of playing offline are that you don't look like an anus for keeping all
of the treasure to yourself, and it's the only way to view the credits and the game's real ending. Enemies have a
slightly lower HP count offline, and there are fewer of them. On the other hand, there are a number of map layouts you'll
only encounter online. In either online or offline modes, there are three difficulty settings: Normal, Hard, and Very Hard.
Normal is best suited for characters level 1-20, and is the only mode you can play when just starting out. Once you've
reached level 20, Hard mode becomes accessible online, and when you've hit level 40, you can play on Very Hard. The Hard
and Very Hard modes are playable offline after you've cleared the preceding difficulty setting. For example, clear Normal
mode offline and you can play Hard; clear Hard offline and you can play Very Hard. The only real difference between
difficulty modes is that enemies become stronger and more aggresive.
|
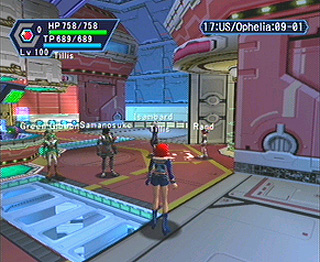
When you begin any game either online or offline, you'll start off in the Hunter's Guild of Pioneer 2.
You have access to a small chunk of the ship which, conveniently enough, offers all the necessities and comforts an
adventuring Hunter could ask for -- provided, of course, you've got a pocket full of Meseta. The sexy nurses at the
Medical Center will restore your HP, TP, and eliminate all status ailments for the measly price of 10 Meseta -- and who's to
say what they wouldn't do if you slip an extra hundred in there... In the Shopping District, you can purchase new weapons,
armor, and items; or if you've got a ??? item lumbering around your inventory, have the Tekker grope it around to turn it
into a useful weapon. The Check Room is your spare inventory: since you can only carry 30 types of items with you at any
time, you can dump all your extra stuff in here for safekeeping until you need it. The Check Room can hold up to 60 items
and 999,999 Meseta. The Principal is where you go when you're punished. ...no, not really. Online, it doesn't have much
use, but offline you must talk to Principal Tyrell after clearing each stage to save the status and follow the story. The
Hunter's Guild, where you begin each new game, is your mission hub: go up to the counter to view a list of available quests,
which I'll get to after running down the gameplay basics.
|
When you think you're good to go, run into the warp room to be beamed down to Ragol. The first time you
play, you'll appear in the Forest, but once you've reached a new area, you'll be able to jump straight to there at any time.
Your character can be moved around the screen with the D-pad while the action buttons can be assigned a number of functions.
There are two basic attacks: normal and strong. The normal attack does less damage, but has a higher chance of making
contact and less "power-up" time. (Additionally, some weapons offer a third special attack that can cause status effects,
launch a Technique, etc.) Attacks can be chained to form double or triple punches, although the timing and effects vary
depending on the weapon you're using. Assign a Technique to one of the action buttons then simply press to launch the
spell. Certain items (such as mates and fluids) can also be assigned to be used at the press of a button. PSO utilizes a
targeting system that automatically locks-on to the nearest interactive object. If this object is an NPC, you can strike
up a conversation; if it's an Item Container or an enemy, you can attack it. And so the game progresses in the way: walk
around an area, fight off a few waves of enemies, proceed to another area where you fight off some more enemies. Once you
reach the end of the stage, you'll fight a boss before proceeding to the next level.
Should you die on your journey, your screen will turn red and your character will drop all his Meseta and
his equipped weapon before falling to the ground and being rendered immobile. During this state of limbo, you're given two
choices: return to Pioneer 2 or wait. By returning to Pioneer 2, you automatically appear with restored HP and TP in the
Medical Center. If you want your stuff back, you have to return to the spot you died to pick it up. Obviously, this is
your only choice when playing offline. When playing online, it's generally better to wait for one of your teammates
to revive you. This saves you a trip and also restores your HP and TP, but there is risk involved: if you haven't quite
been a team player or your teammates are untrustworthy, they could choose simply to take your Meseta and weapon while
leaving you to rot. There are actually whole guilds of thieves who will start a game with you, act like they're your best
friend in the world, then run off with all your stuff the second you hit the floor. So watch your back.
The best safeguard against thieves is the Guild Card system. Each character has a Guild Card that
contains their information along with a small comment. By giving your Card to another player, that player can search for
and contact you via an in-game instant messaging system anytime you're online. Of course, exchanging Guild Cards won't
stop a thief from pulling a fast one on you, but if you've got his Card, you'll be able to search for him anytime he's
online and extract your revenge. On a somewhat more virtuous note, by exchanging Guild Cards with your buds, you'll be
able to locate each other anytime.
Starting a game online is a little more complex than gearing up offline. As soon as you connect, you
will be asked to choose a Ship (server) to begin on. There are servers in Japan, USA, and Europe -- you'll default to the
region your copy of the game is from, but you can play in any country's servers. The ships in Japan are named after moons
of Jupiter, while the US ships are named after moons of Uranus and the European ships after moons of Saturn. For Japan: Io,
Europa, Ganymede, Callisto, Amalthea, Himalia, Elara, Pasiphae, Lysithea, Carme, Ananke, and Leda. (The latter three
servers were added later to accomodate Ver.2, but are accessible to version 1 players.) For US: Oberon, Ariel, Umnbriel,
Miranda, Puck, Cordelia, Ophelia, and Titania. For Europe: Iapetus, Rhea, Tethys, Titan, Dione, and Mimas. (Note that
some, if not most, of these servers have since closed.) Within each ship are 16 Blocks, and within each Block are 10
Lobbies. A Lobby holds a certain amount of people and is the general "preparation" point where you meet friends or set up
games. Go up to the information desk in any Lobby to warp to another ship, set up a game, or join a game.
One cool feature of the online lobbies is that special gimmicks can be added to the look at any time
without requiring downloads. For instance, play online around a holiday and you'll get a cool holiday graphic in the lobby
as well as a change in BGM. Here's a list of the special events:
12/23-12/25: Christmas
01/01-01/15: Giant '01 in the lobby
02/08-02/14: Giant hearts in the lobby, new BGM
04/09-04/15: Giant Easter eggs in the lobby, new BGM
06/16-06/30 2001: As part of the festivities celebrating Sonic's 10 birthday, Sonic, Tails, Knuckles, and Eggman appear
behind various counters in the online lobbies. The BGM changes to "Open Your Heart," the Sonic Adventure theme.
|
There are several ways to chat when playing online. The easiest and most intuitive is simply to plug in
the DC keyboard and type away. The only problem with this method is that it can only be used to communicate with team
members speaking the same language, not to mention the fact that the anal-retentive language censor will frequently block
words that are spoken with meanings clean as the pope's criminal record. (Type "Saturday" and your character will say
"Sa#!@%ay".) To communicate with foreign players, there's a simple sentence building system that incorporates a number of
common phrases and will automatically translate them into every user's respective language. For instance, you select the
phrase "How are you?", and your Japanese teammate reads: "Ogenki desu ka." You select: "I don't have any money.", and your
French comrade sees: "Je nais pas d'argent." You select: "I'll generate the PHOTON BLAST!" and your fellow English players
say: "Why the fuck are you using the lame Word Select system, you queer?" The Word Select system supports all five
languages found in the game: Japanese, English, French, Spanish, and German. A more intuitive if slightly less versatile
way of communicating across the language barrier is the Symbol Chat system, which allows you to create your own 'emoticon'
faces using a set of basic shapes and symbols. If you want to contact a player not in the same game or lobby as you are,
you can do so via Simple Mail, a basic instant message program designed to communicate with anybody on your Guild Card
list.
|
Okay, so you know the basics of gameplay and communication. Now it's time to get into the gory details
about items. Your character can carry up to 30 items (including equipped weapons and armor) at any one time, although an
additional 60 can be stored in the Check Room. Items can be found in Item Containers during the game and in the Shopping
District on Pioneer 2. Here's a listing of what you'll find (some common, some rare):
|
Monomate -- Restores 70 HP
|
Dimate -- Restores 200 HP
|
Trimate -- Restores all HP
| |
Monofluid -- Restores 70 TP
|
Difluid -- Restores 200 TP
|
Trifluid -- Restores all TP
| |
Antidote -- Cures Poison
|
Antiparalysis -- Cures Paralysis
|
| |
Moon Atomizer -- Revives a fallen character
|
Sol Atomizer -- Cures all status conditions
|
Star Atomizer -- Restores all the HP of you and nearby characters
| |
Telepipe -- Opens a portal to Pioneer 2 which disappears when you cross back through it
|
Trap Vision -- Temporarily enables you to see all the traps (Android characters always
have this ability)
|
Scape Doll -- Having one of these in your active inventory automatically revives you
when you die.
| |
HP Material -- Raises your max HP by 2
|
TP Material -- Raises your max TP by 2
|
Hit Material -- Raises your ATA by 2
| |
Power Material -- Raises your ATP by 2
|
Def Material -- Raises your DFP by 2
|
Mind Material -- Raises your MST by 2
| |
Evade Material -- Raises your EVP by 2
|
Luck Material -- Raises your LCK by 2
|
| |
Monogrinder -- Raises the ATP of equipped weapon by 2
|
Digrinder -- Raises the ATP of equipped weapon by 4
|
Trigrinder -- Raises the ATP of equipped weapon by 6
|
In addition to standard items, Ragol is home to a whole plethora of weapons and armor. The weapons
system is particularly complex, divided into 12 basic types. For the melee weapons: Sabers, Swords, Daggers, Partisans,
and Slicers. For the long-range weapons: Handguns, Rifles, Mechguns, and Shots. For Forces: Canes, Rods, and Wands. Some
weapons can be embued with a special property that may cause a special effect when used. Each property has multiple levels
of intensity, with higher-level intensities being rarer. Here's how the elemental attributes stack up:
Heat, Fire, Flame, Burning -- Add fire property to the weapon
Ice, Frost, Freeze, Blizzard -- Add ice property to the weapon
Shock, Thunder, Storm, Tempest -- Add lightning property to the weapon
Panic, Riot, Havoc, Chaos -- Can cause Confusion in the enemy
Draw, Drain, Fill, Gush -- Can steal the enemy's HP
Heart, Mind, Soul, Geist -- Can steal the enemy's TP
Bind, Hold, Seize, Arrest -- Can cause Paralysis in the enemy
Dim, Shadow, Dark, Hell -- Can cause the enemy to die instantly
Charge, Spirit, Berserk -- More attack power, but at the cost of Meseta, TP, or HP
Master's, Lord's, King's -- Can steal extra EXP from an enemy
Devil's, Demon's -- Can reduce an enemy's max HP
Another factor that should go into the decision of what weapon to pack along is to consider the area
you'll be playing. The enemies in each of the four levels have a unique attribute: Native for the Forest, A.Beast (Altered
Beast) for the Caves, Machine for the Mines, and Dark for the Ruins. Some weapons will have special Photons that will
enhance or detract their effectiveness toward a certain type of enemy. For instance, if you find a Gigush with 40% Native
but -30% Machine, it would be a powerful weapon in the Forest but nigh useless in the Mines. Each weapon can have up to
three Photons. Here is the complete standard (1-9 stars) weapon listing, divided by type, in descending order from weakest
to strongest:
|
Sabers
|
Swords
|
Daggers
|
Partisans
|
Slicers
| |
Saber
|
Sword
|
Dagger
|
Partisan
|
Slicer
| |
Brand
|
Gigush
|
Knife
|
Halbert
|
Spinner
| |
Buster
|
Breaker
|
Blade
|
Glaive
|
Cutter
| |
Pallasch
|
Claymore
|
Edge
|
Berdys
|
Sawcer
| |
Gladius
|
Calibur
|
Ripper
|
Gungnir
|
Diska
| |
DB's Saber
|
Flowen's Sword
|
Blade Dance
|
Brionac
|
Slicer of Assassin
| |
Kaladgolg
|
Last Survivor
|
Bloody Art
|
Vjaya
|
Diska of Liberator
| |
Durandal
|
Dragon Slayer
|
Cross Scar
|
Gae Bolg
|
Diska of Braveman
|
|
Handguns
|
Rifles
|
Mechguns
|
Shots
| |
Handgun
|
Rifle
|
Mechgun
|
Shot
| |
Autogun
|
Sniper
|
Assault
|
Spread
| |
Lockgun
|
Blaster
|
Repeater
|
Cannon
| |
Railgun
|
Beam
|
Gatling
|
Launcher
| |
Raygun
|
Laser
|
Vulcan
|
Arms
| |
Varista
|
Visk-235W
|
M&A60 Uzis
|
Crush Bullet
| |
Custom Ray v.00
|
Wals-MK2
|
H&S25 Justice
|
Meteor Smash
| |
Bravace
|
Justy-23ST
|
L&K14 Combat
|
Final Impact
|
|
Canes
|
Rods
|
Wands
| |
Cane
|
Rod
|
Wand
| |
Stick
|
Pole
|
Staff
| |
Mace
|
Blow
|
Baton
| |
Club
|
Striker
|
Scepter
| |
Club of Laconium
|
Battle Verge
|
Fire Scepter: Agni
| |
Mace of Adaman
|
Brave Hammer
|
Ice Staff: Dagon
| |
Club of Zumiuran
|
Alive Aqhu
|
Storm Wand: Indra
|
Here are a few unique 9-star weapons that don't fall into any of the above types:
|
Akiko's Frying Pan -- The only way to acquire Akiko's Frying Pan is to play a certain
sequence of quests in offline mode. It's rather weak, but is universally equippable. More
importantly, it just looks damn cool to be successfully wailing on Dark Falz with a frying pan.
|
Agito -- A type of sword you'll run into occasionally... the maker and model varies, and
some are fakes while others are real. Only the appraiser in the Seek My Master quest can
determine its value.
|
Oroti-agito -- Arguably the rarest item in the game despite being only 9 stars, the
Orotiagito is the legendary true Agito. AUW1975 model, made by Dousetsu. The way to
obtain it is to collect four Books of Katana and an Agito, then take them to the appraiser in the
Seek My Master quest. The Oroti-agito's special attack halves enemy HP.
|
Brave Knuckle -- The weakest of the claw/knuckle weapon types, which are designed to up
attack power in unarmed combat. Its special attack can cause Paralysis in enemies.
| |
|
|
|
Even the 9-star weapons become fairly common in Very Hard difficulty setting, but there's a whole slew of
10-12 star weapons that are so phenomenally rare, to quote the Versus Books strategy guide, "you could play for a hundred
hours and never see a single one." Here's a list of the super rares, in no particular order, with brief descriptions:
|
Soul Eater -- A cursed scythe that drains its user's HP. Kireek uses this item in the
Battle Training quest, and it's possible to ultimately fight and win the item from him in a
hidden story thread which can only be followed by playing a certain sequence of offline quests.
|
Soul Banish -- An enhanced version of the Soul Eater with the same strengths and
drawbacks.
|
Sonic Knuckle -- Ups the speed of attacks in unarmed combat. Its special attack steals
EXP.
| |
Angry Fist -- Enhanced version of the Brave Knuckle. Its special attack can freeze
enemies.
|
God Hand -- The ultimate "unarmed combat" gear, it adds +5 to LCK, +15 to ATA, and +5 to
DEF. Its special attack steals EXP.
|
Photon Claw -- Offers speedy close combat attacks with right hand. Its special attack
steals the enemy's HP. (This is the weapon Sue uses in Dr. Osto's Research.)
| |
Silence Claw -- Close combat claw with the potential to kill an enemy in a single swipe.
Equippable only by Hunters.
|
Nei's Claw -- This tremendously rare item was one of the prizes in the Japan-only PSO
Famitsu Cup contest. It is equippable only by HUnewearls and RAcaseals, and its special attack
steals enemy HP.
|
C-Bringer Rifle -- A rifle made from a Chaos Bringer's arm. It is equippable only by
Rangers, and its special attack cuts enemy HP up to Ľ.
| |
Delsaber's Buster -- A sword forged from a Delsaber's blade-like arm. Causes lightning
damage. Attack powers up 100% when used in conjunction with Delsaber's Shield.
|
Pan Arms' Blades -- A slicer-type weapon made from the hands of a Pan Arms. Its special
attack can cause Paralysis in enemies.
|
C-Sorcerer's Cane -- A cane forged from the cane of a Chaos Sorcerer. It is equippable
only by Forces, and it reduces TP consumption by 10% in addition to stealing enemy TP.
| |
S-Beat Blades -- A slicer-type weapon made from the hands of a Sinow Beat. Equippable
only by Hunters and Rangers, it's special attack can kill an enemy in one swipe.
|
Double Saber -- A double-bladed sword. Its special attack steals enemy TP.
|
Stag Cutlery -- An enhanced version of the Double Saber. Equippable only by male Hunters
and Rangers, its special attack can cause Confusion in the enemy.
| |
Twin Brand -- The ultimate double-bladed sword. It is equippable only by Hunters, and
its special attack halves enemy HP.
|
Flame Visit -- A flamethrower equippable only by Rangers. Its special attack can cause
Confusion in enemies. (This is the weapon Bernie uses in Gran Squall.)
|
Inferno Bazooka -- A bazooka that causes mini explosions at the point of impact. Its
special attack halves enemy HP.
| |
Spread Needle -- A shotgun that shoots countless needles, damaging multiple enemies at
once. Equippable only by Hunters and Rangers, its special attack can cause Paralysis in
enemies.
|
Victor Axe -- A one-handed axe. Its special attack steals enemy HP.
|
Chain Sawd -- A chainsaw weapon equippable only by Hunters and Rangers. Its special
attack steals enemy HP. (The name seems to be a mistranslation of "Chain Sword.")
| |
Lavis Cannon -- A sword that fires off a beam of energy that ricochets to damage
multiple targets. Equippable only by Hunters.
|
Egg Blaster -- A handgun made by "a mysterious scientist out to conquer the world."
Does fire damage.
|
Supressed Gun -- A small gun equippable only by Rangers.
| |
Holy Ray -- A gun that fires an impaling beam at enemies. Its special attack can cause
Paralysis in enemies.
|
Heaven's Punisher -- The ultimate gun, equippable only by Rangers. Its special attack,
Divine Punishment, is time-based and can only be utilized during even hundreds on the beat
clock: giant rays erupt from the sky, causing major damage to all enemies.
|
Sting Tip -- A cane equippable only by Forces. It adds 30 to the user's MST, and its
special attack steals enemy TP.
| |
Technical Crozier -- A wand equippable only by Forces. Its special attack casts Barta
with no TP consumption.
|
Magical Piece -- A wand equippable only by Forces. It adds 30 to the user's MST, and its
special attack casts Zonde with no TP consumption.
|
Caduceus -- A rod created based on a legendary holy cane. It is equippable only by
Forces, and its special attack casts Foie with no TP consumption.
| |
Psycho Wand -- The ultimate wand equippable only by Forces. It halves TP consumption,
and its special attack casts a random low-level Technique without TP consumption.
|
|
|
Defensive items come in three varieties: Barriers & Shields, Frames & Armor, and Units. Barriers &
Shields are, well, barriers and shields. All classes can equip barriers, but shields are for Hunters and Rangers only.
Likewise with Frames & Armor: all classes can equip frames, whereas Forces are left out of the armor circle. If you have a
higher level frame or armor, it could have up to four slots. Now, there are many great uses for slots. You could, for
instance, fill them with food from all-you-can-eat buffets for later. Unfortunately, the only thing they let you do with
slots in PSO is stick Units in 'em. Units can have any number of neat effects, from upping your attack strength to raising
your resistance to increasing the speed of your weapons. Units are ranked in one of five categories: --, -, normal, +, and
++. The -- units are weakest while the ++ are strongest. Listed below are all the common (1-10 star) defensive items in
descending order from the most common to the rarest:
|
Barriers
|
Shields
|
Frames
|
Armor
| |
Barrier
|
Shield
|
Frame
|
Armor
| |
Soul Barrier
|
Core Shield
|
Giga Frame
|
Psy Armor
| |
Brave Barrier
|
Giga Shield
|
Soul Frame
|
Cross Armor
| |
Flame Barrier
|
Hard Shield
|
Solid Frame
|
Brave Armor
| |
Freeze Barrier
|
Solid Shield
|
Hyper Frame
|
Grand Armor
| |
Psychic Barrier
|
General Shield
|
Shock Frame
|
Absorb Armor
| |
Protect Barrier
|
Glorious Shield
|
King's Frame
|
General Armor
| |
Imperial Barrier
|
Guardian Shield
|
Dragon Frame
|
Imperial Armor
| |
Divinity Barrier
|
Ultimate Shield
|
Protect Frame
|
Holiness Armor
| |
|
Spiritual Shield
|
Perfect Frame
|
Guardian Armor
| |
|
Celestial Shield
|
Valiant Frame
|
Divinity Armor
| |
|
|
Ultimate Frame
|
Celestial Armor
|
And the units:
|
Knight/Power -- Raises ATP by 5
|
General/Power -- Raises ATP by 10
|
Ogre/Power -- Raises ATP by 15
|
God/Power -- Raises ATP by 25
| |
Priest/Mind -- Raises MST by 5
|
General/Mind -- Raises MST by 10
|
Angel/Mind -- Raises MST by 15
|
God/Mind -- Raises MST by 25
| |
Marskman/Arm -- Raises ATA by 3
|
General/Arm -- Raises ATA by 7
|
Elf/Arm -- Raises ATA by 11
|
God/Arm -- Raises ATA by 15
| |
Thief/Legs -- Raises EVP by 10
|
General/Legs -- Raises EVP by 20
|
Elf/Legs -- Raises EVP by 30
|
God/Legs -- Raises EVP by 40
| |
Digger/HP -- Raises max HP by 10
|
General/HP -- Raises max HP by 20
|
Dragon/HP -- Raises max HP by 30
|
God/HP -- Raises max HP by 40
| |
Warrior/Body -- Raises DFP by 10
|
General/Body -- Raises DFP by 20
|
Metal/Body -- Raises DFP by 30
|
God/Body -- Raises DFP by 40
| |
Angel/Luck -- Raises LCK by 5
|
God/Luck -- Raises LCK by 10
|
|
| |
Master/Ability -- Raises ATP, MST, ATA, EVP, and DFP by 10
|
Hero/Ability -- Raises ATP, MST, ATA, EVP, and DFP by 15
|
God/Ability -- Raises ATP, MST, ATA, EVP, and DFP by 20
|
| |
Resist/Fire -- Raises fire resistance by 3
|
Resist/Flame -- Raises fire resistance by 7
|
Resist/Burning -- Raises fire resistance by 11
|
| |
Resist/Cold -- Raises ice resistance by 3
|
Resist/Freeze -- Raises ice resistance by 7
|
Resist/Blizzard -- Raises ice resistance by 11
|
| |
Resist/Shock -- Raises lightning resistance by 3
|
Resist/Thunder -- Raises lightning resistance by 7
|
Resist/Storm -- Raises lightning resistance by 11
|
| |
Resist/Light -- Raises light resistance by 3
|
Resist/Saint -- Raises light resistance by 7
|
Resist/Holy -- Raises light resistance by 11
|
| |
Resist/Dark -- Raises dark resistance by 3
|
Resist/Evil -- Raises dark resistance by 7
|
Resist/Devil -- Raises dark resistance by 11
|
| |
All/Resist -- Raises fire, ice, lightning, light, and dark resistance by 3
|
Super/Resist -- Raises fire, ice, lightning, light, and dark resistance by 7
|
Perfect/Resist -- Raises fire, ice, lightning, light, and dark resistance by 11
|
| |
HP/Restorate -- Gain HP as you walk (slow)
|
HP/Generate -- Gain HP as you walk (medium)
|
HP/Revival -- Gain HP as you walk (fast)
|
| |
TP/Restorate -- Gain TP as you walk (slow)
|
TP/Generate -- Gain TP as you walk (medium)
|
TP/Revival -- Gain TP as you walk (fast)
|
| |
PB/Amplifier -- Photon Blast fills as you walk (slow)
|
PB/Generate -- Photon Blast fills as you walk (medium)
|
PB/Create -- Photon Blast fills as you walk (fast)
|
| |
Wizard/Technique -- Level of all Techniques rises by 1
|
Devil/Technique -- Level of all Techniques rises by 2
|
God/Technique -- Level of all Techniques rises by 3
|
| |
General/Battle -- Weapon speed increases by 10%
|
Devil/Battle -- Weapon speed increases by 20%
|
God/Battle -- Weapon speed increases by 30%
|
| |
State/Maintenance -- Prevents all status conditions (Androids always have this ability)
|
Trap/Search -- Enables you to see all traps (Androids always have this ability)
|
|
|
And the rares, in no particular order:
|
Hunter Field -- A thin defensive field equippable only by Hunters. If a Hunter Field,
Ranger Field, and Force Field are equipped on different characters in the same game, the chances
that you'll encounter a rare enemy increase substantially.
|
Ranger Field -- A thin defensive field equippable only by Rangers. If a Hunter Field,
Ranger Field, and Force Field are equipped on different characters in the same game, the chances
that you'll encounter a rare enemy increase substantially.
|
Force Field -- A thin defensive field equippable only by Forces. If a Hunter Field,
Ranger Field, and Force Field are equipped on different characters in the same game, the chances
that you'll encounter a rare enemy increase substantially.
| |
Revival Garment -- Protective gear that slowly recovers HP as you walk.
|
Spirit Garment -- Protective gear that slowly recovers TP as you walk.
|
Stink Frame -- Protective gear. Apparently, it stinks...
| |
D-Parts ver1.01 -- Protective gear equippable only by Androids.
|
Parasite Wear: Nelgal -- Boosts defense, but decreases HP. Not equippable by Androids.
|
Parasite Wear: De Rol -- An enhanced version of Parasite Wear: Nelgal with the same
strengths and drawbacks. Not equippable by Androids.
| |
Parasite Wear: Vajulla -- The ultimate Parasite Wear, with the same strengths and
drawbacks of the weaker two. Not equippable by Androids.
|
Sense Plate -- Defensive gear that makes traps visible. Equippable only by Hunters and
Rangers.
|
Graviton Plate -- Raises DFP, but lowers ATA. Equippable only by Hunters and Rangers.
| |
Attribute Plate -- Protective gear that boosts all resistances when equipped. Equippable
only by Hunters and Rangers.
|
Flowen's Frame -- When used in conjunction with Flowen's Sword and Flowen's Shield,
you'll get a significant boost in DFP. Bears the serial number 52-0003.
|
Custom Frame ver.00 -- Protective gear used by military mechanic group "TeamXX".
| |
DB's Armor -- When used in conjunction with Delsaber's Buster and DB's Shield, you'll get a
significant increase in attack speed.
|
Invisible Guard -- A transparent shield that significantly boosts DFP. Look for a
matching line of transparent clothing to follow in the Spring.
|
Sacred Guard -- A defensive barrier that protects against any status ailments.
| |
S-Parts ver1.16 -- Special shield parts equippable only by Androids.
|
Light Relief -- A protective screen for the left hand that boosts Dark resistance.
|
Shield of Delsaber -- A barrier made from a Delsaber's left arm. EVP doubles when used
in conjunction with Delsaber's Buster. Equippable only by Hunters and Rangers.
| |
Attribute Wall -- A protective screen that boosts all resistances.
|
Secret Gear -- A protective screen designed for stealth.
|
Combat Gear -- Gear for the left hand that boosts ATP instead of DFP.
| |
Proto Regene Gear -- A prototype of the Regenerate Gear. The regeneration isn't
functional.
|
Regenerate Gear -- A shield that restores HP when enemy attacks are deflected.
|
Regene Gear Adv. -- An enhanced version of Regenerate Gear that restores HP and TP when
enemy attacks are deflected.
| |
Flowen's Shield -- When used in conjunction with Flowen's Sword and Flowen's Frame,
you'll get a significant boost in DFP. Bears the serial number 52-0003.
|
Custom Barrier ver.00 -- Protective shield used by the military mechanic group "TeamXX".
|
DB's Shield -- When used in conjunction with Delsaber's Buster, you'll get a significant
boost in attack speed.
| |
That's the two dollar lesson in items, the only combat technique left to cover is just that: Techniques.
Techniques are the magic spells of the PSO world. There are a total of 19 Techniques in the game that can be learned by
all characters except Androids. Each Technique has 15 levels of strength with 15 being the max. (The only exceptions to
this rule are Reverser and Ryuker, which only have one level each.) Techniques are learned by using Technique Disks, which
can be found on the battlefield or bought in the Shopping District. Like the strength requirements of weapons and armor,
high level Disks require a minimum MST level to use. Here's a primer on all 19 Techniques and their effects:
|
Foie -- All Forces begin with Foie level 1 in their arsenal. It's a basic fireball
attack that damages one enemy.
| |
Gifoie -- An enhanced version of Foie, Gifoie sends a stream of fireballs rotating around
the area the spell is cast in, covering a wide radius around your character.
| |
Rafoie -- The ultimate version of Foie, Rafoie causes a big explosion at the point of
impact which will damage all enemies caught in the blast.
| |
Barta -- Barta is an ice elemental attack that sends a stream of ice crystals zipping
along the ground toward its target, damaging everything in its way.
| |
Gibarta -- An enhanced version of Barta, Gibarta sends a sprinkling of snowy ice death
to its target.
| |
Rabarta -- The ultimate version of Barta, Rabarta sends a chilling wave of frosty
goodness out in a wide radius surrounding your character. It has a high chance of freezing
enemies that it hits.
| |
Zonde -- Zonde is a lightning elemental attack that causes a bolt from the blue to zap
your target. Because it follows your victim, it almost never misses.
| |
Gizonde -- An enhanced version of Zonde, Gizonde sends a powerful bolt of electricity
charging into your target, then spreads to include any other enemies within range.
| |
Razonde -- The ultimate version of Zonde. A bunch of homing bolts fire from your
electrifying body to buzz all enemies within range for major damage.
| |
Grants -- The most powerful attack spell in the game, Grants causes an explosion of
light that seems to come from within the target's body. It is the only light elemental
Technique.
| |
Megid -- A dark elemental attack that makes a puff of purple smoke appear around the
target, either causing instant death or jack squat.
| |
Shifta -- Temporarily boosts your ATP. At higher levels, it'll also boost the ATP of any
allies within range.
| |
Jellen -- Temporarily reduces the ATP of its target. At higher levels, it reduces the
ATP of its target and any enemies within range.
| |
Deband -- Temporarily boosts your DFP. At higher levels, it'll also boost the DFP of
any allies within range.
| |
Zalure -- Temporarily reduces the DFP of its target. At higher levels, it reduces the
DFP of its target and any enemies within range.
| |
Resta -- Recovers some of your HP. At higher levels, it'll recover your HP and the HP of
any allies within range.
| |
Anti -- Cures all status conditions you may have contracted. At higher levels, it'll
also cure the status conditions of any allies within range.
| |
Reverser -- Revives a fallen ally. Same affect as a Moon Atomizer.
| |
Ryuker -- Opens a porthole to Pioneer 2 that closes when you cross back through it. Same
effect as a Telepipe.
|
And on the sixth day, God created Mag, and saw that it was good. And on the seventh day, God said: "What
in my own name was I thinking?!" Mags, those creepy little creatures that hover over your character's shoulder like
they're going to suck out your soul at any time, are simultaneously a blessing and a curse. First the bad news: Mags eat.
Alot. I mean, ALOT. They eat recovery items from your inventory. Different items have different effects on a Mag's stats.
The exact formulas are quite complex and vary from one Mag type to the other, but a general rule of thumb is that the more
expensive/valuable it is, the better the chances are he'll like it and benefit from it. A Mag will get hungry about once
every 3˝ minutes, and while you don't always have to feed it, letting it starve for too long with lower its Synchro level
(ungrateful little bastard). Now here's the good news: as your Mag strengthens, so do you... as long as you have it
equipped. Additionally, as your Mag evolves, it will gain up to three Photon Mirage (Photon Blast) attacks. Photon
Mirages are triggered after you've taken enough damage to have your PB meter fill to max. There are a total of six
different Photon Mirages, but no one Mag can lay claim to more than three:
Farla -- A giant, unhappy-looking serpent flies upward in a circle around the summoner, damaging anything within radius.
Leilla -- A weird, freaky, and notably non-sexy alien mermaid woman comes down and heals your character.
Pilla -- A tough-looking wizard creature with some dry, dry skin lays the smack down on all enemies within the vicinity.
Estlla -- A silvery, faceless dolphin creature cuts across the screen in a straight line, damaging any enemies it hits.
Mylla & Youlla -- A pair of hyper-cute twin aliens who perform an idiotic dance which casts Shifta and Deband on your
character.
Golla -- A psychadelic elk who charges in and sticks his antlers into one unfortunate enemy.
A Mag's level (max 200) grows with six different stats: POW (power), DEF (defense), DEX (dexterity), MIND
(Technique strength), Synchro, and IQ. Synchro measures your Mag's affection rating toward you on a percent scale from
0-120. If you wait too long to feed it, or feed it something it doesn't care for, the Synchro level will drop. Likewise,
some items apparently make it stupider, causing its IQ to drop. If your Mag's Synchro and IQ are high enough, it will
automatically do nice stuff for free, like casting Shifta and Deband on your character when you enter a boss fight, making
you temporarily invincible when the PB meter fills, casting Resta on you when your HP drops dangerously low, or even
casting Reverser on you when you die.
There are a total of 36 basic Mag types, plus eight rare types. All characters start off with the basic
Mag form, and how it evolves from that point depends on a number of factors: the items you feed it, the class of your
character, your Section ID, etc. Here's a list of the 36 basic Mag types (all derived from Hindu mythology) in
alphabetical order:
|
Andhaka
|
Apsaras
|
Ashvinau
|
Bana
|
Bhirava
|
Durga
|
Garuda
|
Ila
|
Kabanda
| |
Kaitabha
|
Kalki
|
Kama
|
Kumara
|
Madhu
|
Mag
|
Marica
|
Marutah
|
Mitra
| |
Naga
|
Namuci
|
Nandin
|
Naraka
|
Ravana
|
Ribhava
|
Rudra
|
Sita
|
Soma
| |
Sumba
|
Surya
|
Tapas
|
Ushasu
|
Varaha
|
Varuna
|
Vayu
|
Vritra
|
Yaksa
|
Acquiring one of the eight rare types is quite tricky. First, you need to get your hands on one of six
hyper rare items: Cell of Mag 213, Cell of Mag 502, Heart of Chao, Heart of Opa Opa, Heart of Pian, or Parts of Omochao.
Once you've got your dirty hands on one of these treasures, conditions must match an exact set of criteria before you can
feed the item to your Mag and have it evolve into the rare form. The rare forms are: Chao (from Sonic Adventure), Churel,
Omochao (from Sonic Adventure), Opa Opa (from the Sega classic Fantasy Zone), Pian (from NiGHTS), Pitli, Preta, and
Sonichi.
Alright: so you've got your bitchin' cool character equipped with a killer weapon and a slick Mag.
You're ready to venture down to Ragol and layeth the proverbial smack down. First, you'll need to know exactly what kind of
wildlife you'll be encountering:
|
Booma -- These nasty bear creatures attack simply by slashing. They're weak to fire
attacks, but resistant to lightning. Found in the Forest 1 and 2.
| |
Gobooma -- A stronger version of Boomas, with faster attacks and pointier heads. They're
weak to lightning attacks, but resistant to fire. Found in the Forest Area 1 and 2.
| |
Gigobooma -- The ultimate version of Boomas, with the fastest, most powerful slashes.
They're weak to ice attacks, but resistant to everything else. Found in the Forest 1 and 2.
| |
Rag Rappy -- These friendly-looking fowls made their debut in PS3, and returned in PS4.
You can usually spot them at a distance as they snooze soundly -- nail 'em while they're still
asleep and they'll run away, saving you a fight. If you get too close, they'll notice you and
attack with pecks of doom, forcing you to fight them to the ground, where they lie for a while
before hopping back up and running off. You can nail 'em again as they escape for a freebie
item. They're weak to fire and ice, but resistant to everything else. Found in Forest 1 and 2.
| |
Savage Wolf -- These guys attack in packs, where they circle your character looking for
the right moment. They'll only ever attack you if you turn your back to them, which is easy to
avoid unless you're faced with several at once. Each pack's leader is the lone Barbarous Wolf:
kill him first and all the Savage Wolves of the group will cast Zalure and Jellen on themselves
in their depression. (I hope you feel just horrible.) They're weak to fire and lightning, but
very resistant to ice. Found in Forest 1 and 2.
| |
Barbarous Wolf -- The leaders of each wolf pack, with slightly stronger attacks. Other
than that, they're identical to Savage Wolves right down to the strengths & weaknesses. Found
in Forest 1 and 2.
| |
Monest -- This disturbingly anatomical-looking plant monster can't attack by itself, but
will spout droves and droves of Mothmants in your face to protect itself. It's weak to fire and
lightning. Found in Forest 1 and 2.
| |
Mothmant -- Irritating little mosquito creatures that are spouted out in handfulls by
Monest plants. Luckily, they don't have significant resistance to anything except light
attacks. Found in Forest 1 and 2.
| |
Hildebear -- These giant, ugly gorilla-bat things are as strong as they look and one hell
of alot more agile. They drop down onto the screen and throw hulking punches at anything they
see, and if you try to escape by running away, they'll either leap high into the air and land
smack in front of your face or start blowing fireballs at you. They're weak to ice attacks, but
resistant to everything else, especially fire. Found in Forest 2.
| |
Evil Shark -- Sharks look like alien versions of Boomas, and attack in the same way with
about double the speed. They're weak to fire. Found in Caves 1, 2, and 3.
| |
Pal Shark -- A stronger version of Evil Sharks. They're weak to fire and ice, but
resistant to lightning. Found in Caves 1, 2, and 3.
| |
Guil Shark -- The ultimate version of sharks. They're weak to lightning and resistant
to everything else. Found in Caves 1, 2, and 3.
| |
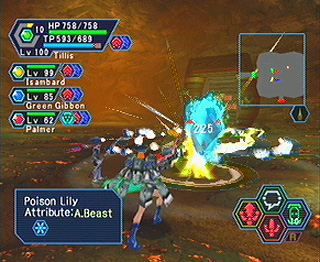
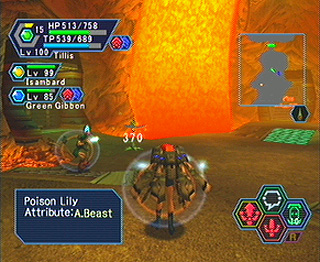
Poison Lily -- These smart-ass flowers get my vote for the most irritating enemy in PSO.
They're immobile, but attack by firing orbs that will cause Poison or Paralysis in their target.
Then the little bastards laugh at you. They're weak to everything except lightning and
dark. Found in Caves 1, 2, and 3.
| |
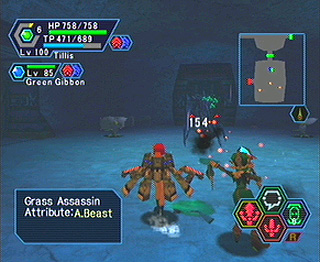
Grass Assassin -- Originally appearing in PS2 and 4 as "Locusta," these masters of mantis
style like to immobilize their victim with a blast of Assassin spit, then charge 'em. They're
weak to fire and resistant to everything else, particularly ice. Found in Caves 1, 2, and 3.
| |
Nano Dragon -- Winged dragon creatures that fire really, really painful beams. They're
weak to ice and lightning, but tremendously resistant to fire. Found in Caves 1, 2, and 3.
| |
Pofuilly Slime -- Slimes aren't big on attacking, and will zip around the floor in a harmless
puddle state most of the time. When they do pop up, you have time to land exactly one single hit
before they fold back up and puddle around some more. If you use any kind of ice attack on them,
they'll split into two separate Pofuilly Slimes. They're weak to every elemental attack except dark.
Found in Caves 2 and 3, and rarely in Caves 1.
| |
Pan Arms -- Another guest from PS3 (where they were known as "Twinarms"), the Pan Arms
monster is actually two weaker enemies clasped together. While they're back-to-back, Pan Arms
attacks with laser blasts. Damage it enough and the two halves separate into a Hidoom and a
Migium. Hidoom slashes and is nigh immune to fire attacks, but is weak to ice. Migium casts
Jellen and Zalure on your team and is nigh immune to ice attacks, but is weak to fire. Found in
Caves 2 and 3, and rarely in Caves 1. Occasionally drops a "Pan Arms arm" which Montague can
turn into a useful item.
| |
Gillchic -- The next incarnation of Boomas and Sharks, Gillchics move a bit slower but
attack hard and fast with double punches that can potentially inflict Slow Motion in your
character. They're also capable of nailing you with laser blasts from a distance. They're
very resistant to fire and ice, but are weak to lightning and light. Found in Mines 1 and 2.
| |
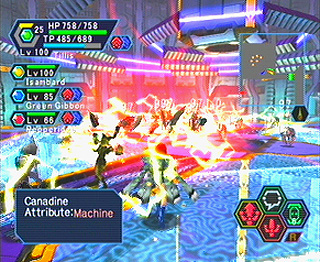
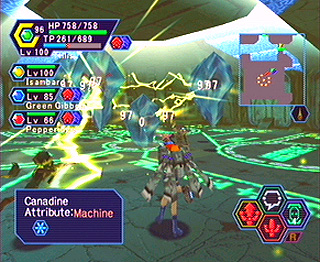
Canadine -- The robotic equivalent of Mothmants, Canadines can be found zipping along of
their own free will or forming a circular "wall" around Cananes. If they're surrounding a
Canane and you destroy the Canane first, the Canadines will freak out and self-destruct. If
they're roaming free, they'll zap you with electricity. They're nigh immune to fire, but weak
to ice and lightning. Found in Mines 1 and 2.
| |
Canane -- These are only ever found surrounded by Canadines. They're weak to fire and
ice, but resistant to everything else. Found in Mines 1 and 2.
| |
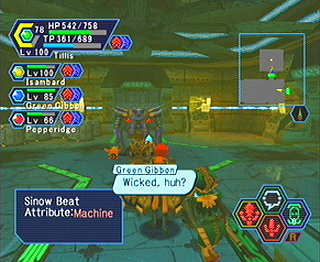
Sinow Beat -- These agile agitators hang on the ceiling until you get too close, at which
point they drop down and zip right up to your face to begin pounding you with a rapid barrage of
punches that can potentially cause Confusion in your character. They're weak to fire and
lightning, but resistant to everything else. Found in Mines 1 and 2. Occasionally drops a
"S-beat's arm" which Montague can turn into a useful item.
| |
Sinow Gold -- Basically identical to Sinow Beats except that they're only weak to fire.
Found in Mines 1 and 2.
| |
Dubchic -- Like zombified Gillchics, except that these rusty, rickety robots seem to have
alot more lasting power. They're usually controlled by a Dubwitch lurking on the ceiling, and
will all explode when the Dubwitch is destroyed. They're resistant to fire and ice, but weak
to everything else. Found in Mines 2.
| |
Dubwitch -- These dinky little discs have no offensive abilities at all other than to
send a horde of lumbering Dubchics at you. Typically you've got to knock down a significant
amount of their Dubchic cronies in order to lure them out of hiding. They're weak to everything
except dark. Found in Mines 2.
| |
Garanz -- Oh, boy. I had so much fun with these monsters back in the early days.
We'd all run up, get owned, go out and gain another 5 or 10 levels, come back acting all
arrogant like "Hey, remember US?!", get owned again, and the whole process would repeat itself
over and over until we were all, like, level 60. Garanz' only attack is to nail you with a
couple blasts of homing missiles, but the catch is that the less HP Garanz has left, the more
powerful those missiles become. Only the highest level characters can survive a double punch
from Garanz missiles in his final phase. He's weak to fire, but resistant to everything else.
Found in Mines 2.
| |
Claw -- These slow-moving tadpoley things float around and attack by snapping at you.
They're fairly weak individually, but they attack in big groups and are difficult to lock-on to.
They're weak to fire and light, but are particularly resistant to lightning. Found in Ruins 1,
2, and 3.
| |
Bulclaw -- If mine memory serves me correctly, these HP-syphoning parasites first
appeared in PS2. Knock them around enough, and they split into four Claws and a Bulk. They're
weak only to light. Found in Ruins 1, 2, and 3.
| |
Dimenian -- The ultimate version of the Booma/Shark/Gillchic continuum, Dimenians move
quickly and slash with speed and power. They're weak to fire. Found in Ruins 1, 2, and 3.
| |
La Dimenian -- A stronger version of Dimenians. They're weak to ice. Found in Ruins 1,
2, and 3.
| |
So Dimenian -- The ultimate version of Dimenians. They're resistant to all elemental
attacks, but have the least resistance to lightning. Found in Ruins 1, 2, and 3.
| |
Delsaber -- These deadly quick menaces are capable of leaping from one side of the room
to the other just to drop down in your face and make like a rogue samurai slashing you to bits
and pieces. They slash quickly, and will shield most of the normal attacks you throw at them.
They're weak to ice. Found in Ruins 1, 2, and 3. Occasionally drops a "Delsaber's left arm" or
"Delsaber's right arm" which Montague can turn into useful items.
| |
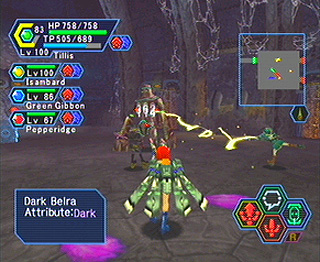
Dark Belra -- These towering baddies pack plenty of punching power, but not a whole lot
of agility. They can launch their claw-like arms at you from a distance, which is probably
their most dangerous attack. They're weak to lightning and light. Found in Ruins 1, 2, and 3.
| |
Chaos Sorcerer -- Bearing a passing resemblance to Wizeman, these evil mages can cast
Rafoie and Gibarta with the aid of two magical crystals, Bee L and Bee R. After taking some
damage, they disappear and warp to another part of the arena to continue their dark ways.
They're resistant to all elemental attacks. Found in Ruins 1, 2, and 3. Occasionally drops a
"Chaos Sorcerer's right arm" which Montague can turn into a useful item.
| |
Death Gunner -- These crawling critters zip along the ground in groups, then all attack
in sync with powerful laser shots that can waste a low-level character without remorse. They're
resistant to all elemental attacks except light. Found in Ruins 2 and 3.
| |
Chaos Bringer -- The last returning enemy from PS lore is the Chaos Bringer, who
originally appeared waaaay back in PS1 as "Horseman", and returned in PS4 as "Centaur." He is
a naaasteee puppy, with the most powerful attacks you'll encounter from any non-boss monster.
He can charge across the arena, and if you're in his line of fire, your HP is about to drop
really low, really fast. Stand too close and he'll tear you in two with a mighty slash from
his sword. His strongest attack is a weird magic green pulse thing that damages everyone in
the vicinity -- this deadly attack will wipe low-level characters out and piss on their dead
bodies. Chaos Bringer is resistant to all elemental attacks. Found in Ruins 2 and 3.
Occasionally drops a "C-bringer's arm" which Montague can turn into a useful item.
|
Of course, like everything else in PSO, monsters come in two varieties: common and rare. There are four
rare enemies who will almost invariably drop a valuable item (some of which can't be acquired any other way) when killed.
This is who they are, and here is what they do:
|
Al Rappy -- These blue Rappies are 2 to 3 times more powerful than their more common
yellow counterparts, but are your best chance for finding one of those rare Mag items. They're
weak to fire. Found in Forest 1 and 2.
| |
Hildeblue -- These powerful incarnations of Hildebears trade in their red skin for some
cool blue. They're weak to fire. Found in Forest 1 and 2.
| |
Nar Lily -- A red version of Poison Lilies, with the potential to drop a coveted Psycho
Wand. Resistant to fire and dark, but weak to everything else. Found in Caves 1, 2, and 3.
| |
Pouilly Slime -- A red version of Pofuilly Slimes, these guys are highly resistant to
fire and somewhat resistant to dark, but weak to everything else. Found in Caves 1, 2, and 3.
|
In addition to the sentient enemies you'll encounter roaming around, you may also stumble across immobile
obstructions in the form of traps. Traps first begin appearing in the Caves, and are invisible to non-android characters
unless a Trap Vision is used or a special item is equipped. These irritating obstructions appear when you get too close,
and are usually found in clusters. Get away while you can, because if you stick around to investigate, the traps will
explode and inflict one of the following effects: HP damage, confusion, slow, poison, paralysis, or the rare HP recovery.
Other traps include the visible smashing columns which are found only in the Caves, and the falling bell traps found only in
the Ruins. If you're stuck in a bell trap, you can only wait until it explodes on you or have a teammate break you out.
|
Forest -- You begin your quest on Ragol's woodsy surface. As you head for the
Central Dome, Red Ring Rico's messages mention that the normally placid wildlife have
become mysteriously aggresive recently... The Forest consists of two Areas: Area 1 is
bright and sunny, and in Area 2 you get rained on. The species of the Forest are all
Native, and include: Booma, Gobooma, Gigobooma, Rag Rappy, Savage Wolf, Barbarous Wolf,
Monest, Mothmant, and Hildebear. If you're lucky, you may encounter an Al Rappy or a
Hildeblue.
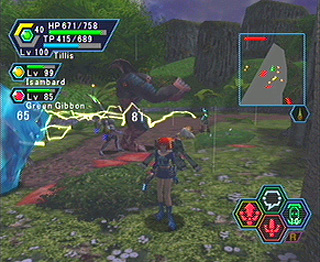
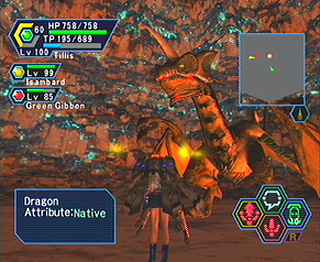
Boss: As you enter the Central Dome, you'll discover an irritable-looking dragon
by the name of, um, Dragon (we at the GHZ prefer to call him "Bob"). Dragon roams around
the screen, occasionally belting out a whip of flame from his ugly maw. It's usually
fatal if you get nailed by a direct hit, so the strategy is to always be on his blind
side. When he gets tired of walking, he'll take to the air (where he cannot be damaged
by most attacks) and fire blasts of flame down below. After he's taken a certain amount of
damage, he'll begin diving into the ground and burrowing across the floor, usually
targeting one sole character. His weakness, unsurprisingly, is ice. Just be careful
when you've taken him down, because ol' Bob has one last attack: don't let his dead
carcass fall on you.
| |
Caves -- Your journey takes you into the underground caverns of Ragol's crispy
crust. The Caves consist of three Areas: the first is a toasty volcanic region, while
things cool down in the waterlogged second floor. The third Area is dank and oddly
mechanical... The local wildlife have all been transformed into fiercer, nastier versions
of their normal selves: Altered Beasts (reference to the classic Sega arcade probably
intended). The beefed-up baddies include: Evil Shark, Pal Shark, Guil Shark, Poison Lily,
Grass Assassin, Nano Dragon, Pofuilly Slime, and Pan Arms. If you're lucky, you may
encounter a Nar Lily or a Pouilly Slime.
Boss: The fellow responsible for transforming all of the Cave's fauna is a
mutated serpent by the name of De Rol Le, unfortunate result of a scientific experiment
gone really, really wrong. He'll start off by chucking time-bomb spikes onto the raft:
sometimes they'll just hover in place and explode, sometimes they'll surround one unlucky
character. He'll usually follow up with a double blast of purple orbs: they're quite
deadly and should be avoided like that gay dork who keeps giving you the eye in biology
class. Occasionally, De Rol will zip up to the front of the raft and sweep the surface
with a laser blast. When he idiotically flops himself onto the deck (leaving him wide
open to attack), he'll repeatedly thrust a probing tentacle down upon one unfortunate
character. De Rol's main weakness is fire, but most players find Gizonde to be the most
effective offensive technique.
| |
Mines -- Leave the organic world behind and get techno in the Mines. (You gotta
love the disco rooms.) The Mines consists of two Areas: the first floor is sleek and
sci-fi, while the lights dim and the enemies get grittier in Area 2. All the enemies
roaming these glittering halls are of the Machine variety: Gillchic, Canadine, Canane,
Sinow Beat, Sinow Gold, Dubchic, and Garanz. Lightning attacks will potentially cause
Short in Machine enemies, making the Zonde Techniques the most valuable asset in the
Mines.
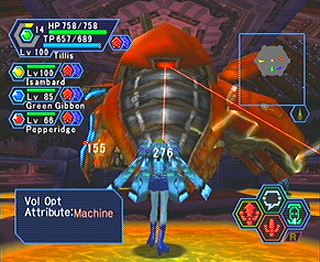
Boss: Main computers that acquire minds of their own and go postal always seem to
cause problems, and Vol Opt gives the term "fatal error" a whole new meaning. Vol Opt attacks
in two distinct phases: in the first, electrical cylinders pop out of the floor while
one drops down from the ceiling. The main target is the cylinder that's flashing red,
but by knocking down the one on the ceiling, the totems on the floor will stay out longer.
The more cylinders you destroy, the easier it becomes to damage the real thing: that
creature that keeps circling the room from within the giant computer monitors. After
taking enough indirect damage in this state, Vol Opt will finally come out to play. He
appears as a giant, hulking chunk of Transformer crap in the middle of the room, and
what comes next is a painful little game of ring-around-the-rosey. Vol Opt's attacks are
designed to keep you running in a circle: a red tracking beam is followed by a series of
giant stakes which slam into the ground right on your ass. He'll occasionally launch a
group of homing missiles at one unlucky target, and his other offensive attack is to
encase a single player in a wall of stone then pelt him with lasers. He'll pause briefly
between attacks, and that's your chance to nail him (lightning is his weakness), but be
quick because he has the ability to heal himself.
| |
Ruins -- The Ruins are the ancient, underground structures that Rico speculated
may have existed. If you're playing offline, unfortunately, you've gotta do some
backtracking before you can access the Ruins. After clearing the Mines, you must run
back to the Forest, Caves, and Mines again to activate the monolith in each area.
Apparently, "Muut Dis Poumn" is the password that your character must utter, but luckily
all you have to do is press the A button. After you've activated all three monoliths,
you get to go all the way through the Mines and beat Vol Opt again before finally
being able to access the last leg of your journey: the Ruins. The Ruins are the resting
place of Dark Falz himself, the perpetrator of the nastiness going down on Ragol. This
glorified coffin consists of three Areas: each a little darker and slimier than the one
before it. All enemies are Dark, and include: Claw, Bulclaw, Dimenian, La Dimenian, So
Dimenian, Delsaber, Dark Belra, Chaos Sorcerer, Dark Gunner, and Chaos Bringer.
Boss: Everybody give it up for PS series villain Dark Falz, making headlines on
his big Ragol tour. Ol' DF can be a nasty bastard if you aren't prepared. You should be
tipped off that something is not quite right as you warp from the dark, dank Ruins to a
beautiful meadow filled with flowers and butterflies. A big obelisk lies right in the
middle of the field: walk up to it to have the pristine scene transformed into a dark
mess of evil, filled with spinning bladed flowers called Darvants. These deadly buds are
literally all over the arena, and can cut down even the most high-level character so
quickly, you'll be exclaiming: "I can't believe I'm not butter!" Clean out a requisite
number of Darvants for the man of the hour to appear. DF kicks off the battle atop a
bizzare, four-headed monster that slides around the arena. The heads are the only
vulnerable point in this phase: they spit out more Darvants for you to play with while DF himself
will occasionally cast fire and ice techniques on you. In his second form, DF leaves the
arena and circles the exterior, occasionally casting an almost entirely inescapable spell.
Beat the second phase in Normal mode, and you're done. But if you're playing on Hard or
Very Hard, prepare to witness the ultimate third form. This is where the real fun
begins. The arena transforms into a giant ring, with an ethereal-looking DF floating
around in the middle. When he's in the air, DF is immune to all forms of attack. When
he's flashing, he's immune to everything except guns of the Draw/Drain/Fill/Gush element.
He'll fire off a series of blue orbs at one character -- they can be dodged if you run in
a perfect arc, but getting pummeled by the entire wave of 'em will almost invariably take
you down regardless of what your level is. Every once in a while, he'll cast Grants or
Megid on all characters: both are unavoidable, and only the strongest characters will
make it through Grants alive. When the bad boy comes down and begins zipping around to
the edges of the ring, your chance to attack is ripe: just watch out for his slashing
arms. Also, if you're playing online, keep an eye open for the flashing image of one of
your teammates within DF's gut: one of his attacks is to temporarily absorb the soul of
one of the party members. If you attack DF when he's hugging somebody's soul, you'll be
damaging that character as well as DF. DF has no particular weaknesses, and unfortunately
for Forces, he's virtually immune to Techniques.


|

|
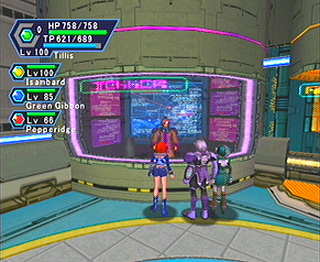
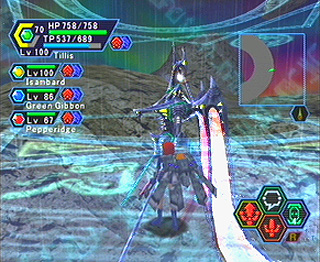
And that's the main game. By clearing the game online, you're rewarded with the screen to the left
(insert your own party into the four slots). Clear the game offline on any difficulty setting to view the credits, and
clear it on Very Hard mode to hear the vocalized version of the ending theme. Although the max level for any character is
100, most players should be able to clear Very Hard mode offline by level 80 or so.
Oh yeah, remember those quests you can get at the Hunter's Guild? Quests are basically short,
story-driven excursions with pre-determined paths and treasures. You're rewarded with Meseta and sometimes items for
clearing a quest. They're usually (but not invariably) area-sensitive, and will open up as you access new areas in the
main game. Like everything else in PSO, they come in both online and offline varieties: the online quests can accommodate
1-4 players, although once a quest is in play, no new players can join. There were a few downloadable quests and contests
added, but most wouldn't be translated to English until later iterations of the series (Ver.2 and Episode II). The quest
lists are as follows:
| Offline Quests
|
Title: Magnitude of Metal
Client: Garon, trader
Reward: 500 Meseta
Quest: A trader named Garon commissions you to locate a Mag that was stolen on a trip
back from Ragol. He hopes you'll perform better than Dacci, the chubby RAmar he originally
hired to do the job. While you're searching through the Forest, you'll run across a RAcaseal
named Elenor Camuel who will join your party and explain the basics of the Mag system.
|
Title: Claiming a Stake
Client: Racton's son
Reward: 700 Meseta
Quest: This guy sends you off in search of his father, Racton, who moseyed on down to
Ragol with the bright idea of claiming land. You discover the tubby HUmar Racton cowering behind
a fallen rocket in the Forest, but he refuses to go back until you've recovered the three capsules he
used to mark his territory.
|
Title: The Value of Money
Client: Gizel's wife
Reward: 300 Meseta
Quest: You'll never have to leave Pioneer 2 on this quest, but you do get to save a
Jerry Springer case marriage. This ornery old broad wants you to make her husband, Gizel, stop
wasting money -- apparently, he buys too many weapons. So basically you get to run back and
forth between the old witch and her henpecked hubby until you convince him to lay off the
weapon addiction for a while.
|
Title: Battle Training
Client: Zidd
Reward: 500 Meseta
Quest: Some poor schnook Hunter who is not as badass as you has gotten himself in some
kind of trouble down in the Forest. The Hunter's cousin, Zidd, sends you off to locate him,
teaming you up with a cranky HUcast named Kireek. During the quest, Kireek will fill you in
on the battle system in a very demeaning way. The Hunter you're looking for is a HUmar named
Ash Canaan, who is found lying next to an important data disk.
|
Title: Journalistic Pursuit
Client: Nol, journalist
Reward: 1200 Meseta
Quest: A journalist by the name of Nol Rinale, frustrated by the government control over
the flow of information, decides that it's her duty to bypass the man and bring the truth behind
the Ragol incident to the citizens of Pioneer 2. She wants you to take her, which you should
have no complaints with because she's a hotty HUnewearl. Unfortunately, she isn't very strong
and requires alot of monitoring. Your goal is the computer terminal in Forest 2, at which point
Nol decides she's already seen enough and doesn't want to know the truth because she's a
pansy-ass weenie woman. Ignorance, indeed, is bliss, but at least you still get paid.
|
Title: The Fake in Yellow
Client: Guls's assistant
Reward: 800 Meseta
Quest: You're off to the Forest in search of Dr. Guls, a biologist who is apparently just
a tad too fond of Ragol's native life. The striking thing is that the only enemies you'll face
in this quest are Rappies -- one in particular won't attack you, but runs off when you approach
him. Keep following him to discover that the seriousness of Dr. Guls's fetish is far greater
than anyone could've imagined.
|
Title: Native Research
Client: Alicia
Reward: 2500 Meseta
Quest: A luscious FOmarl named Alicia Baz instructs you to collect biological data on Ragol's
wildlife for research being conducted at an undisclosed lab which she is an assistant at. In order to
attain the data, you must kill the animals in question, which Ms. Baz seems to find a questionable
method. Your problems is that the data capsules she gives you with which to hold the data only last
for 20 minutes, so you've got that exact time limit to hack & slash through the Forest destroying at
least one each of the five enemy types.
|
Title: Forest of Sorrow
Client: Alicia
Reward: 1500 Meseta
Quest: Alicia isn't satisfied with the results you collected in the data capsules, she
wants to see for herself. Haha. You know she wants you, she's just playing coy. She's worth
it, so you may as well play along. Just when you think you've found a spot in Forest 2
secluded enough for the two of you to start getting... cozy, a damned baby Hildebear shows up
and Alicia insists on following it. When you finally catch up to the "Hildebaby", Alicia, in
typical female fashion, asks for your opinion only to disregard it entirely in deciding whether
or not to take the young'un back to Pioneer 2. Then the quest ends. Well, maybe next time...
|
Title: Gran Squall
Client: Travel Agency
Reward: 1000 Meseta
Quest: A pleasure boat called the Gran Squall was lost on Ragol, and the travel agency
commissions you to keep their collective money-grubbing ass out of the hot seat. There are
opposing Hunters wandering all around Forest 1, including HUmar Gizel (not to be confused with the NPC
Gizel from the Value of Money) and RAmar Dacci, but the only one who'll join you is a RAmar nicknamed
Bernie. Bernie shares his info with you and mentions that while the Gran Squall did indeed crash on
Ragol, it was not a cruise ship but in fact a secret military ship. He goes on to say that he's
searching for the sole survivor of the crash, a young girl with a data chip implanted in her body.
Travel with Bernie to Forest 2 where you'll encounter the chipped girl - a cute little FOnewearl named
Rupika - lying near the entrance to where the boss warp would otherwise be. Before you can offer to suck
that chip out of her body, Bernie insists that you go on ahead, the killjoy.
|
Title: Addicting Food
Client: Trekka
Reward: 1500 Meseta
Quest: It seems that the powers that be on Pioneer 2 have placed restrictions on what
types of food can be consumed while on board the ship. Unfortunately for everyone, sweets are
among the contraband. This chick named Trekka has apparently had her heart set on landing on
Ragol just so she could eat sweets again, but with the landing postponed, she's taking
desparate measures. She's hired you to travel to Ragol and get her what she wants. Lovely.
Just where the schmook are you gonna find a sweet shop on Ragol? Why, at the bottom of
the Caves, of course. It seems a trio of cuties, the Naura sisters, has set up a cake shop deep
in Cave 3 because it has the "ideal climate" for baking. (The fruity "slog through a ridiculously
long dungeon to find an underground cake shop" quest is a PS tradition dating back to PS1.)
|
Title: The Lost Bride
Client: Cicil, force
Reward: 2500 Meseta
Quest: FOmarl Cicil has a problem. She's about to get married, but is in hiding due to,
uh... well, she's just plain fat and is ashamed to show her blubbery self to her fiancé, Albert. She
now wants you to take her on a long jog through the Caves, but here's the catch: by using
Monomates to heal herself, she gains even more weight. If she uses too many, you lose the
quest. So your job is to keep her well healed via Restas or healing rings. Make it to the end
to discover that short, fat Cicil is in actualy a tall, sexy babe. Who is engaged. To some dilweed
NPC named Albert. Sigh.
|
Title: Waterfall Tears
Client: Kroe, hunter
Reward: 1800 Meseta
Quest: A HUnewearl by the name of Kroe Waynes is sending you into the Caves to locate her twin
sister, Anna, who recently disappeared along with a group of other hunters. Although Anna is the older
of the twins, she apparently missed out on the maturity gene that her sister possesses, and it seems
she's recently begun hanging out with some bad company. You find Anna in the very first room, along with
a RAmar named Gekigasky. The two promptly attack you. Defeat them and they run off deeper into the Caves.
Anna's set up assloads of traps all over the place, making your travels needlessly difficult. In Caves 2,
you may run across a couple of morbid-looking guys named Tonzlar and Tobokke. Tonzlar is a tubby RAmar who
mumbles something about not wanting to help the daughter who will ultimately betray him, and Tobokke is a
mohawked HUmar who will say absolutely nothing to you. Ignore these misfit hunters and you'll eventually
meet up with Anna once again. She's alone this time, and decides that she's going to take all your items
for herself. Defeat her a second time and she changes her tune in short order, begging for mercy. When
you mention that Kroe hired you to find her, Anna gets all teary-eyed and runs back home to her loving
sister. That takes care of your problem, but the other hunters remain missing...
|
Title: Black Paper
Client: Kroe, hunter
Reward: 2000 Meseta
Quest: Your quest this time is relayed via the BEE communication system, and your client is Kroe
Waynes. She's gotten to the bottom of the missing hunter mystery: the individual responsible is some
trader known as "Black Paper". Black Paper is a shady individual known for trafficking weapons, android
parts, and sometimes humans. In order to sneak into the black marketeer's group, Kroe poses as her twin
sister Anna and tricks Black Paper's henchmen. In Caves 2, you encounter Kroe and a couple of henchmen:
a RAmar named Doronbo and a FOnewm named Mujo. They'll run away, but you'll be attacked by the melancholy
Tonzlar, who was whining about his ungrateful daughter in Waterfall Tears. Defeat him and continue on to
Caves 3, where you'll eventually encounter Kroe and the two henchmen a second time. They once again escape,
leaving you to face the mohawked Tobokke. Defeat Tobokke and proceed to the next room to see that the
ever-capable Kroe has already taken down Doronbo and Mujo. As it turns out "Black Paper" isn't an individual
but a black market organization.
|
Title: Secret Delivery
Client: Simons
Reward: 4500 Meseta
Quest: You're given a mysterious package by a guy named Simons Olo. The heavy package, to
be delivered to YN-0117, an android in the Caves, contains a device that will allegedly be used to
study the mutated animals under Ragol's surface. The catch is that you have 45 minutes to make the
delivery. Nor rain nor snow nor rabid Nano Dragon shall keep this hunter from his appointed rounds!
Deep into Caves 1, you encounter Bernie who is on his own mission, searching for a girl whose
transmission has been lost in the Caves (he sure seems to be searching for girls alot...). Bernie
examines the package you have and notices the serial number EM-12, which neither of you understands. As
you let Bernie go about his business while you worry about your own quest, you'll encounter three different
RAcasts: two Type:0's and a Type:W. The RAcasts are suspended by laser beams and won't move until you
talk to them. Speak to them to be presented with three options: Cancel, EM-12, or YN-0117. Choose EM-12
and the enraged RAcast will bust out of his laser bindings to whup your ass. Choose YN-0117 and you'll only
confirm that you have the wrong android. Deep into Caves 2, you find mecha-cutie Elenor Camuel lying on the
ground. As it turns out, she is actually YN-0117, and is currently working for Simons who is working under
Dr. Montague.
Disregard the time limit for a moment to speak with the fat NPC near the entrance to warp on Pioneer 2. He
tells you some stuff about some kind of ultimate weapon, to which you can respond with "!!" or "??". Hit
the exclamation points and the NPC tells you all about WEAPONS, a secret organization of Freemasons seeking
the "ultimate weapon." He offers to make you a member, but says you'll first need the approval of all the
members and the boss. He'll bestow you with your first Weapons Emblem, but to procure the other four, you'll
need to replay some old quests. All the WEAPONS members are normal-looking NPC's wandering around Pioneer 2,
so they'll be easy to find, but you must complete the quests in question if you want your Weapons Emblems to
be saved. Go back through the following quests to obtain the other four emblems: Claiming a Stake, Gran Squall,
The Value of Money, and The Lost Bride. Once you have all five emblems, talk to the fat lady standing by the
Check Room in Secret Delivery. As it turns out, she is "the boss", and she bestows you with Akiko's Frying Pan,
a rare weapon whose weakness in battle is counterbalanced by its sheer coolness.
|
Title: Grave's Butler
Client: Matha Grave
Reward: 3500 Meseta
Quest: Matha Grave, a cute young FOmarl, has commissioned you to help her search for Blant,
her butler who went missing on Ragol. As you traverse the Caves, you'll encounter a couple of
completely unhelpful hunters... hottie HUnewearl Valletta and fat FOnewm Hopkins. You'll also find message
capsules left by Blant chronicling his search for Matha's parents. The Graves, one a famous biologist and the
other a physicist, were chosen to be among the crew of Pioneer 1 where they did secret research for
the government. Mr. Grave never let on exactly what they were researching, but gave Blant orders to
not let Matha aboard Pioneer 2. Blant disregarded the warning, and joined Matha on the journey
to Ragol. In order to protect his clients' daughter, Blant snuck onto Ragol to find the truth behind
the secret government research. He was shocked to discover genetically engineered creatures, and
speculated that the immigration was just a cover-up for a darker government conspiracy. Blant's final
message capsule is a farewell message to Matha, as the monsters in Cave 2 proved too difficult for the
unprepared butler to handle. Guess he didn't bring enough Scape Dolls.
|
Title: Knowing One's Heart
Client: Elly Person
Reward: 3500 Meseta
Quest: Elly Person is a cute young FOnewearl who has enlisted your help for a very
special reason: she had a 'net buddy (uh-oh) aboard Pioneer 1. She was eager to finally land
on Ragol and meet him, but feared for his survival after the explosion. She's just recently
received another message from him though, meaning he's still alive. Now the two of you are
going to traverse into the Mines to locate Elly's cyber sweetie, Calus. As you hack and slash
through the Mines, Elly keeps receiving weird messages from Calus: one minute he insists that
she turn back, the next he says he was just kidding and wants her to continue. When you finally
do locate Calus, Elly is shocked to discover that he's nothing more than a computer. A computer
who's about to process his last file, at that. Ah, the tragic end to a love that was not meant
to be. Calus does have some interesting info to impart before he processes his last algorithm:
after the explosion, he was hacked by some unknown force, and all the robots in the Mines were
programmed to attack Pioneer 2. Hmm... Talk to the red-headed HUnewearl roaming around on
Pioneer 2 and she'll mention that there was a real Dr. Calus aboard Pioneer 1. He was a young
engineer working on an "independent computer", but died an untimely death. Again I say, hmm...
|
Title: Dr. Osto's Research
Client: Three scientists
Reward: 5500 Meseta
Quest: A trio of scientists who are either A) triplets or B) inarguable proof of the
laziness of PSO's graphic artists, want you to scurry down to Mine 2 and procure some secret
data left by a Dr. Osto Hyle. Dr. Osto, renowned for his work in electricity and genetics, was,
along with Dr. Montague, one of the greatest scientists in the world. He was chosen to be among
the crew of Pioneer 1, but all data involving this mysterious man was deleted from Pioneer 2.
Inquiring minds, namely the three scientists, want to know! As you traverse into Mine 2, you'll
have your third encounter with Tonzlar, who you met previously in Waterfall Tears and Black Paper.
He attacks you as in your second encounter, and upon his defeat, warns of your certain death should
you continue. Since you just whupped his ass you shouldn't take his warning seriously, so proceed
into the Mines to encounter Sue, PSO's template HUnewearl. Sue mentions that she was travelling with
someone but got separated from her partner, so she joins up with you. Continue along your merry way
with your newly-acquired date and you'll encounter Gekigasky, also from Waterfall Tears and Black
Paper. Gekigasky recognizes Sue, but quickly silences himself when he realizes she's not alone.
Have you just created a love triangle, or is there perhaps something more going on? Hmm... Not much
further you'll find the main computer along with the data the three scientists are after. Sue mentions
she's on the same quest, and requests to copy the data. As you're ready to head back, Sue decides to
stay behind and dig up more information, but first asks you your name. Should you choose to tell her,
you gain access to a sub-plot that involves backtracking through a number of old quests:
Unsealed Door: Talk to Sue in Mine 2, and she'll warn you, in a caring, concerned manner, not to mess
around in the affairs of Black Paper. She gives a special warning about someone known as the "Black Hound".
The Black Hound, it seems, is an android built solely for combat. Go back and talk to Bernie near the
entrance and he'll offer you the same advice, further mentioning that Sue herself is a member of Black Paper.
Waterfall Tears: Meet Bernie again in Cave 1, and he'll divulge a big, juicy secret: Black Paper is
one of the 10-nation alliance; in short, it's controlled by the same people behind the entire Pioneer Project.
He also expresses relief that you still haven't encountered the Black Hound, who is apparently on your trail...
Return to Pioneer 2 and you'll encounter Sue near the Check Room. Grill her about Black Paper, and she'll only
admit to knowing what it is before she rushes off.
Black Paper: Meet Bernie again in Cave 1, and he tells you that he and a comrade of his have been on the
Black Paper case for a while. Furthermore, he suggests that you join them. Once again, return to Pioneer 2 and
you can grill Sue regarding her reasons for boarding Pioneer 2 and what she intends to accomplish on Ragol. As
before, she skirts the issue regardless of what you ask her and hurries off.
Knowing One's Heart: Find Bernie yet again in Mines 1. He doesn't seem concerned about the Black Hound
anymore, and again offers you to join he and his comrade in their search. Before you can agree or decline,
a tremor shakes the earth and Bernie has to jet.
Seek My Master: This quest ends suddenly and without resolution here. When you encounter Bernie lying on
the ground, talk to him and he'll admit that he had no interest in Ragol or the government, and merely wanted
to help Zoke, his benefactor. There's nowhere else to go with this thread until Ver.2. While the Bernie/Zoke
plot is over, if you've completed this entire sequence of events you'll get a special extension to the "Soul of
Steel" download quest...
If you refuse to tell Sue your name at the end of Dr. Osto's Research, you can follow an entirely
different sub-plot with a more substantial reward:
Unsealed Door: Meet Sue here, and listen to what she has to say.
Waterfall Tears: After you beat Anna, proceed further and you'll encounter your old pal Kireek,
who introduces himself as the "Black Hound", insists he has orders to kill you, and proceeds to make an
earnest attempt at devouring your soul.
Black Paper: Kireek seems quite thrilled at having found a worthy opponent, and challenges you to a
rematch in Cave 1. This time you have to fight him in the dark.
From the Depths: After you part with Ash, go back to Ruins 2 to find the pansy-ass hunter once again lying
on the ground. Kireek is nearby, and Ash warns you that the Black Hound is no longer the person he used to be.
Approach Kireek and some environment weirdness transpires before the wild android attacks you for the last time.
Defeat him to receive his weapon, the rare and extremely cool-looking Soul Eater.
|
Title: Unsealed Door
Client: Three scientists
Reward: 5500 Meseta
Quest: The three scientists, like Alicia from Forest of Sorrow, are not satisfied with the
information you've brought them and want to know more about the legendary "Beta772" spoken of in
Osto's research. One of the scientific trio will be joining you on your journey back through the Mines:
Mome, a fat RAmar with the brawn of an anorexic schoolgirl and the brains of a really intelligent brick.
Mome wants to see Beta772 with his own eyes. As it turns out, Osto was doing research on unknown bio-cells,
and Beta772 was his test sample. Although Beta772 began life as a small, centipede-esque creature, its main
method of survival was to take the cells of other living creatures. As it did so, it would transplant its own
cells into its victims, who would then become prone to aggressive behavior. After an earthquake on Ragol, Beta772
began self-replication, rapidly increasing its own cell count. As the scientists tried to move it to a larger
cage, it rampaged and broke loose, injuring 23 staff members and killing 6. Beta772 escaped into a drain pipe and
headed toward the surface, and would eventually become known by the hunters of Pioneer 2 as "De Rol Le." Now it's
your job to drag Mome backwards through the Mines then fight De Rol Le, all the while babysitting Mome and
his sorry candy ass. Once you've defeated the beast and acquired a piece of its flesh for study, the three
scientists chicken out and opt to leave the research material in the hands of Dr. Montague.
|
Title: Doc's Secret Plan
Client: Dr. Montague
Reward: 9000 Meseta
Quest: Dr. Jean Carlo Montague, FOnewm and genius in bio-technology, has created a new prototype weapon
that he wants tested. He requested you specifically under the recommendation of his masterpiece, Elenor, who it
seems has become quite smitten with you as of late. Elenor is in control of Montague's prototype superweapon, and
she's already laid out three data recording capsules in Ruin 1. Defeat all the monsters in each of the three rooms
and warp back to present the collected data to Montague, who proudly proclaims that the test weapon is made from
monster biological data. After studying the Ragol wildlife, he noticed that the Photon energy emitted by the
monsters was very unique, so, being not only a scientist but also an able blacksmith, Montague constructed a
weapon based on the data. As thanks, he offers to make you a special weapon if you can bring him any monster
parts. If you have any enemy parts bouncing around your inventory (Pan Arms' arms, S-beat's arms, Chaos Sorcerers
right arm, Delsaber's left arm, Delsaber's right arm, or a C-bringer's arm), bring them to Dr. Montague in any
quest which he appears and he'll transform the useless monster parts into a swell weapon or armor.
|
Title: Seek My Master
Client: Shino, android
Reward: 6000 Meseta
Quest: You're teaming up with Shino, another cutie RAcaseal, who is in search of her
master, Zoke Miyama, known among hunters as "Great Sword Zoke". Modern androids are independent and
it is unusual for one to have a "master", but it turns out that Shino is an older model, having
served Miyama for over three generations. Only her exterior is modern. Because of this, Zoke,
travelling with our blond buddy Bernie, commanded Shino to retreat to Pioneer 2 as they were
exploring the Ruins. Shino obliged, but it's been a long time since Zoke and Bernie went into the
Ruins, and they haven't contacted her at all. She wants to know what's up, and it's your job to
make sure she gets there in one piece. As you travel through Ruin 1 and 2, you'll encounter occasional
tremors, which Shino claims are not earthquakes. When you come across Kamui, Zoke's left-hand sword,
lying on the ground in Ruin 2, it is evident that something's not cool. Soon after you meet a fallen
Bernie who musters up a last bit of strength to warn the two of you away. You're not going to listen to
him, of course, because, well... he's on the ground and you're not, which can only mean that you're
stronger than he is. In the next room you'll find Yasha, Zoke's right-hand sword. In the room after
you'll find Zoke, predictably lying on the ground enjoying his last moments in the world of the living.
With his last breaths, he gives Shino to one final task: warn the people of Pioneer 2. After that, she
is to be free, either to find another master or become independent. Instead she chooses to stay in the
Ruins by her master's body and rust to nothingness as the late Zoke decomposes in front of her. She slops
her final task - warning the people of Pioneer 2 - onto you and gives you Sange, Zoke's third sword, as
proof that you completed the quest.
Back in town, talk to the tekker by the Check Room and he'll fill you in on the legend behind the four
swords: Long ago, the families of three famous blacksmiths were executed by a king. The blacksmiths
vowed vengeance against the king and the nation, and so, along with one of their pupils, each set
about forging his own unique sword. The four swords were said to have the power to destroy an entire
planet, and would lead the nation to ruin. Sure enough, the nation collapsed soon after. Zoke had
three of these legendary swords: Kamui (AUW 1977 model, made by Tengai), Yasha (AUW 2018 model, made by
Kikoku), and Sange (AUW 1963 model, made by Jou'un). But the fourth sword, Agito, is still at large.
There are many fakes, but the one true Agito, the Oroti-agito (AUW 1975 model, made by Dousetsu), has
never been found.
|
Title: From the Depths
Client: Irene, secretary
Reward: 3500 Meseta
Quest: Ragol's just been the victim of a major earthquake, and by now everyone should be
having some serious doubts as to the planet's inhabitability, but Irene Sepa (the Principal's secretary)
sends you down into the Ruins to rescue a research team that was down there. It seems to be a
pretty major assignment, as both the army and council have commissioned numerous hunters to
investigate the cause of the frequent earthquakes as well as locate the missing researchers. You
start your mission in Ruin 2, where a hunter duo consisting of a RAmar named Type:0 and a HUmar
named Takuya are conducting their own investigation. Takuya seems to want to cut up, but Type:0,
being a 'droid of duty, forces him along. Eventually, the two cross a mysterious mist trap that
paralyzes both of them. When you approach the fallen hunters, they disappear into the mist before
you can do anything. Further down, you'll encounter Dacci and Gizel (from Gran Squall). Talk to
Dacci, and he mumbles something about 100 years. Talk to Gizel and both of them disappear into
puffs of smoke ala Type:0 and Takuya. Continue further still and you'll encounter a lone FOmarl
named Nadja, who appears to have a severe case of schizophrenia. After talking with herself for a
while and complaining that you aren't listening, she snaps and attacks you. Defeat her and she
does her own disappearing act. Continue to Ruin 2 where you'll team up with Ash, that former weakling
HUmar you met in Battle Training. Ash says that the research team is already dead, and that some
strange machine is causing the earthquakes. Continue into the Ruins and you'll find a strange monument
next to the computers. Ash speculates that the monument has something to do with controlling the
computers and even the monsters. Download the army's research data from the computers. The
earthquakes stop. Return to Pioneer 2 where you part ways with Ash, who says he's going to go back and
see if there's anyone left. Give your somber report to Irene, and your quest is finished. But exactly
what the hell was wrong with all those psycho hunters, and where did they all vanish to? The world may
never know.
|
| Online Quests
|
Title: Lost HEAT SWORD
Client: Hopkins, hunter
Type: Win Back
Quest: A chunky FOnewm named Hopkins has just returned from fighting Dragon, but it seems
he's lost his Heat Sword, a valuable weapon which was given to him by his father. The object is
simply to clear the Forest and defeat Dragon to return the Heat Sword to Hopkins.
|
Title: Lost ICE SPINNER
Client: Hopkins, hunter
Type: Win Back
Quest: Hopkins, busybody that he is, has lost another valuable weapon given to him by his
father. This time, he lost an Ice Spinner while fighting De Rol Le. The object of the quest is
simply to clear the Caves and defeat De Rol Le to return the Ice Spinner to Hopkins.
|
Title: Lost SOUL BLADE
Client: Hopkins, hunter
Type: Win Back
Quest: Our boy Hopkins is at it again, this time dropping off a Soul Blade while fighting
Vol Opt. His old man must be pissed, but hey, more Meseta for us. Simply clear the Mines and
defeat Vol Opt to return the Soul Blade to Hopkins.
|
Title: Mop-up Operation #1
Client: lieutenant
Type: Defeat
Quest: The lieutenant (of the 32nd WORKS division of the Pioneer 2 outer space task force)
is preparing to lead his troops into the Forest to collect data. Apparently, though, they have
very little combat experience (...) so they're sending you in to clear out the monsters before
the mission begins. Their mission begins in exactly five minutes, leaving you that much time
to clear a pre-set number of monsters from the Forest.
|
Title: Mop-up Operation #2
Client: lieutenant
Type: Defeat
Quest: This time, the lieutenant wants you to clear out the Caves in 8 minutes.
|
Title: Mop-up Operation #3
Client: lieutenant
Type: Defeat
Quest: This time, lieutenant wants you to clear out the Mines in 5 minutes. Yes, master.
Would you like us to fetch the paper and bring you your slippers, too?
|
Title: Mop-up Operation #4
Client: lieutenant
Type: Defeat
Quest: This time, the lieutenant (you'd think he'd have been promoted by now) wants you
to clear out the Ruins in 8 minutes. And he better be damn thankful that there are no more
levels in this game.
|
Title: Endless Nightmare #1
Client: soldier
Type: Defeat
Quest: An anonymous soldier who refuses to discuss his intentions hires you to clear out
all the enemies in the Forest. They seem to be regenerating constantly, so your mission is to
find the regen point and fight off the seemingly endless stream of baddies pouring out until
they're all gone.
|
Title: Endless Nightmare #2
Client: soldier
Type: Defeat
Quest: Soldier boy is back, and this time he wants you to destroy all the enemies in the
Caves. Fun, fun, fun.
|
Title: Endless Nightmare #3
Client: soldier
Type: Defeat
Quest: This time, G.I. Joe wants you to whack all the monsters in the Mines. (Are you
beginning to understand this mission series' namesake?)
|
Title: Endless Nightmare #4
Client: soldier
Type: Defeat
Quest: Soldier man wants you to clear out all the monsters in -- you guessed it -- the
Ruins. Oh, why the hell not?
|
| Download Quests
|
Title: Letter from Lionel
Client: Lionel
Reward: 4500 Meseta
Quest: A HUcast named Lionel has found himself in a predicament that I can imagine is unique
to androids: he's fallen to pieces, literally. After sustaining some damage, he went into sleep mode
and was attacked by a vicious monster, or so he claims. Whatever happened, he now exists in five pieces
scattered across the Forest and Caves. He's sent a message to the Hunter's Guild via the BEE system
requesting help. In Forest 2, you'll encounter Doronbo from the Black Paper quest. As you remember, Doronbo
was involved with the Black Paper organization, and he's found something valuable that he openly admits he's
going to put on the black market. Ignore him for now and continue searching for Lionel's parts. First you
need to find his head, so you can actually communicate with your client. Lionel's metallic cranium lies near
the boss warp in Forest 2, after which you can find his right arm in the gut of a hungry Hildebear. His right
leg's taking a swim in the stream of Forest 1, and his left leg somehow managed to get itself stuck in a pond
in Caves 2. After you've located all the parts, return to Pioneer 2 and the cowardly Doronbo will relinquish
Lionel's body and left arm as soon as you confront him.
|
Title: Shou no Tamashii (Soul of a Blacksmith)
Client: Ozwald
Reward: 2500 Meseta
Quest: (Note that this quest is available only in Japanese on the original version.) A
blacksmith by the name of Ozwald got access to some secret Photon weapon research, and now he
wants to make one. To do that, he'll need three items: a Miwontite, a Dragon no Kiba (dragon's
fang), and a Koubutsu (mineral). All three materials can, conveniently enough, be found scattered
around the Forest and Caves. The Miwontite can be found at two locations in Forest 1, both lying in
the stream that weaves throughout the stage. You'll need to extract the Dragon no Kiba from Dragon,
under the strong recommendation that you kill him first. The Koubutsu comes in three flavors, all
three of which can be found in the Caves. You'll find the red mineral early on in Caves 1, but if
you traverse deeper you'll find rarer minerals which Ozwald can turn into better weapons. Venture
into Caves 2 for the green mineral, and into Caves 3 for the blue mineral. Once you have everything
you need, take the goods to Ozwald who will transform the materials into your weapon of choice (sword,
gun, or cane) based on the kind of Mineral you brought him and the difficulty mode you're playing on:
|
SWORD
|
Red mineral
|
Green mineral
|
Blue mineral
| |
Normal
|
Fire Sword
|
Frost Sword
|
Havoc Partisan
| |
Hard
|
Fire Sword
|
Frost Sword
|
Storm Cutter
| |
Very Hard
|
Fire Sword
|
Frost Sword
|
Freeze Berdys
|
|
GUN
|
Red mineral
|
Green mineral
|
Blue mineral
| |
Normal
|
Fire Rifle
|
Frost Rifle
|
Havoc Mechgun
| |
Hard
|
Fire Rifle
|
Frost Rifle
|
Havoc Mechgun
| |
Very Hard
|
Fire Rifle
|
Frost Rifle
|
Freeze Beam
|
|
CANE
|
Red mineral
|
Green mineral
|
Blue mineral
| |
Normal
|
Fire Rod
|
Frost Rod
|
Havoc Wand
| |
Hard
|
Fire Rod
|
Frost Rod
|
Havoc Wand
| |
Very Hard
|
Fire Rod
|
Frost Rod
|
Freeze Striker
|
|
Title: Inkyo Hunter (Retired Hunter)
Client: Donoph
Reward: 8000 Meseta (Normal)
12,000 Meseta (Hard)
18,000 Meseta (Very Hard)
Quest: (Note that this quest is available only in Japanese on the original version.) An aged
HUmar by the name of Donoph Baz has a lifelong dream: he wants to defeat 10,000 monsters before he dies.
It was a dream he shared with a friend of his aboard Pioneer 1, a man named Heathcliff. Heathcliff is
dead, and Donoph has only 30 minutes to live. The good news is that he's already killed 9901, so only
99 monsters stand between him and his dream. He could take the easy way out and go squash some mosquitoes
in the forest, but no, he's got to be all manly and dish out his final 99 in Ruins 3. He's hired you to
help him, and you've got 30 minutes to get the job done. Succeed, and as you approach the exit, Donoph
instructs you to return to Pioneer 2 and collect your reward. Then he up and croaks, disappearing into
the same mysterious puff of smoke that the victims of From the Depths vanished in. If you're playing in
Normal or Hard, the quest is now over. But if you're in Very Hard mode, you have the option of playing a
side quest that continues a thread from the offline Soul Eater quest: remember that "other rival" Kireek
was talking about? Donoph's dark past is that he is a survivor from Pioneer 1, where he ruled the black
market. Now he lives (or lived, rather) aboard Pioneer 2 as a retired Hunter. Talk to our FOmarl friend
Alicia Baz (Native Research, Forest of Sorrow) on Pioneer 2, and she opens up Forest 2, which contains a
locked door and a letter from the legendary Heathcliff Flowen. As for what comes next... beats me, I never
made it this far.
|
Title: PSO Famitsu CUP
Client: n/a
Reward: n/a
Quest: (Note that this quest is available only in Japanese. I haven't played it extensively and I can't
understand too much of anything, so the information here is rough, incomplete, and probably inaccurate. If you
can provide detailed, accurate information regarding this quest, please
do so. I bet you'll go to heaven.) This
quest is sponsored, as the title would suggest, by Famitsu magazine, and is actually a time attack
against a series of mini-games. Japanese players could upload their best times to an online ranking
for prizes. You're greeted in the Hunter's Guild by Principal Tyrell, who tells you to head into Forest
1 to begin the contest. You can gawk around at the eAccess signs plastered all over Pioneer 2, but being
that it is a time attack, you probably shouldn't waste time in there. Shino (from Seek My Master) is your
guide in the Forest: you have to collect 11 points in a grand scale game of, from the best I can judge,
rock-paper-scissors to beat the residing champion, Sakura-66. Your four opponents are scattered around
Forest 1, and include a computer monitor, a Rag Rappy, a FOnewm who is an associate of Alicia, and an invisible
guy. The next round takes place in the Caves, where you're greeted by a FOmarl who introduces herself as Morigan,
self same chick who was possessed by Dark Falz in From the Depths (Nadja?). You get RAcast Type:0 on your team, and
the two of you chase Morigan through a series of tunnels and traps. Round 3 in the Mines is against Gekigasky of
Black Paper. He wants to see your speed, which involves a complex game of tag. Once you've finished this one,
you'll warp back to Pioneer 2 and the quest is over.
|
Title: eAccess no (???)
Client: Three scientists
Reward: Chain Sawd (normal), Flame Visit (hard), Sting Tip (very hard)
Quest: (Note that this quest is available only in Japanese. I haven't played it extensively and I can't
understand too much of anything, so the information here is rough, incomplete, and probably inaccurate. If you
can provide detailed, accurate information regarding this quest, please
do so. I bet you'll go to heaven.) My efforts at translating
the title prove futile. Most people just call it the "eAccess quest" or the "Easter quest." Anyway, it seems that
while all of Pioneer 2 was tripping out of their collective mind with the Famitsu Cup quest, Black Paper managed to lay
the snatch on a Splitter and an ADSL modem. You're expected to get the connection tools back. This involves tracking and
spying on a group of scientists in the Mines to determine which ones are the theives. To get the rare weapons mentioned
above, you've got to do an additional side quest that hits you with a series of timed quiz questions. You'll end up
fighting De Rol Le, during which the same three quiz questions will frequently pop up.
|
-- Codes --
Hidden Costumes: To access an additional pair of color combinations for any class when creating your character, put
the following passwords in as your character's name (you'll still be able to give him/her a name you really want, but
you'll have access to the additional costumes):
HUmar: KSKAUDONSU
HUnewearl: MOUEOSRHUN
HUcast: RUUHANGBRT
RAmar: SOUDEGMKSG
RAcast: MEIAUGHSYN
RAcaseal: NUDNAFJOOH
FOnewearl: XSYGSSHEOH
FOmarl: DNEAOHUHEK
FOnewm: ASUEBHEBUI
Screenshots: You can grab a screenshot of your crew in action using this rather complex technique. Plug a
controller into the Dreamcast's fourth controller port, then plug an empty VMU (195 blocks) into the second slot on that
controller. To take a picture of the entire screen, hold A and press START. To take a close-up of the center, hold X and
press START.
Change Point of View: If you're playing online, you can see the world through the eyes of one of your teammates by
plugging a controller into the Dreamcast's third port, then holding down L, R, and up on the D-pad on that controller.
-- Behind the Screens --
The first official word hit the streets on the last week of September, '99. The final game revealed in
Sonic Team's "Enjoy 4" announcement, PSO managed to simultaneously surprise, please, and perplex Sonic Team fans.
While Yuji Naka had been involved in the original Phantasy Star and Phantasy Star II, most would have expected that, if the
series were to be revived, it would be at the hands of Reiko Kodama (the mastermind behind Phantasy Stars 1, 2, and 4) and
the Overworks team. Even more perplexing was the genre. The entire PS series, after all, were RPGs -- the polar opposite
of Sonic Team's trademark action games. Whatever lead to this unexpected project, though, Phantasy Star Online was set to
repeat history and pioneer new territory for console RPGs.
|
Using the trials and errors of ChuChu Rocket! as their guide, Sonic Team got PSO together with no more
than the usual share of development hitches. As the release approached and excitement grew, a limited edition bundle pack
was announced. The bundle was to include a limited edition PSO 4× memory card and a playable demo of the as-yet unreleased
Sonic Adventure 2. The package was cancelled, but the SA2 demo was included with all copies of the game and the PSO 4×
memory card was made available for a short time through Sega Japan's D-Direct shopping service.
A 10,000 person beta test was conducted in November 2000, a month before the final release. In the test
version, a prominent "Battle" mode was featured that was not present in the final build. This was actually a test for a
versus mode that would evolve and later become the sole substance behind Phantasy Star Online Ver.2.
|
The beta test was a success and PSO made its Japanese debut on December 21 as planned, along with a
limited edition series of Section ID dog tags. The US release, after being knocked from mid January to early February back
up to late January was finally released on January 31, 2001. The ship made its way to Europe two weeks later on February
16. While a monthly fee was required for playing online in Japan (purchased in the form of a Hunter's License), Western
PSOers were graced with free unlimited online play (although a fee would be instated about a year later).
As with any good online RPG, vast communities developed as PSO's player base grew bigger and richer. And
of course, with each new batch of players came a new group of stinkers. Armed with unholy devices of evil such as Game
Sharks and similar cracking peripherals, creative individuals found ways of hacking and copying items/weapons (known as
"duping") and even player killing (PKing). As with other network RPGs, cheating remains the bane of PSO to this day,
despite Sega's efforts to curb the problem.
Cheaters weren't the only evil hampering the revolution, though: the normally placid issue of common
programming glitches takes on a whole new meaning when the game in question is an online RPG with locally saved characters.
Sonic Team bent over backwards to ensure that no characters could be copied: each copy of the game was given a unique
serial number and access key to ensure that each file could be played only on the Dreamcast system which it was
registered on. That sounds all good and well, but if your DC goes patootie for whatever reason (and it happens), your PSO
account is as good as erased. And because there is no way to copy the system file, it's impossible to backup your
characters in any (legitimate) way. And every PSOer who knows his Scape Dolls from his Moon Atomizers is familiar with the
BSOD: Black Screen of Death. During times of heavy lag or connection problems, the screen will suddenly turn black but the
music will keep playing. If you power off during this time, you lose your equipped weapons in addition to all the items
and Meseta you're carrying. In the initial builds of the Japanese version, victims of the BSOD also lost all of the items
stored in their inventories, which would suck some righteous baboon balls. Like the cheating issue, the volatile state of
PSO system data is an issue that dogs the PSO community to this day.
However, despite all that is wrong with the execution, Phantasy Star Online has proven itself up to the
task of being the first ever console network RPG, and has been a massive success in all four corners of the civilized world
(and Canada, too).
-- Cultural Notes --
Ship Ahoy: The PSO ship names, as mentioned above, are all derived from moons who derive their names mostly from
Greek gods and Shakespearian characters. For the curious, I've compiled a list of the ship names and a brief synopsis on
the mythology behind each one:
Io -- Fifth of Jupiter's known satellites. In Greek myth, Io is an Argive princess who attracted the attention of
the omnipotent Zeus. Hera, Zeus' wife, was not pleased with her husband's roving eye. In order to hide his new girl toy
from Hera, Zeus transformed Io into a heifer (of all things), but Hera caught on and demanded that the cow be handed over
as a gift. Zeus couldn't refuse, and Hera left Io in the hands of Argus, a giant with 100 eyes. Io was eventually rescued
by Hermes, yet remained tormented by a gadfly sent by Hera to make her life miserable.
Europa -- Sixth of Jupiter's known satellites. In Greek myth, Europa was the daughter of Agenor, and another of Zeus'
love affairs. Pimp daddy Z assumed the form of a handsome white bull and coaxed Europa into following him to Crete, where
the two had three sons.
Ganymede -- Seventh (and largest) of Jupiter's known satellites. In Greek myth, Ganymede is a pretty boy who tickled
the fancy of the ever-horny Zeus, who apparently swings both ways. While Ganymede was herding his flock on Mount Ida, Zeus
sent an eagle to carry the boy to Mount Olympus, where he became the cupbearer of the gods.
Callisto -- Eighth of Jupiter's known satellites. In Greek myth, Callisto is a nymph and avid follower of Artemis,
goddess of the hunt. Among the rules of Artemis' followers is that they must remain virgin, as Artemis herself. Callisto
upheld this mandate with aplomb, and quickly became Artemis' favorite. Enter Zeus, who, aware of Callisto's vow of
chastity, decides that he must play dirty if he's to get what he wants, so he appears before Callisto in the form of
Artemis. Callisto lets her guard down, and is subsequently raped by the big Z. When Callisto's pregnancy is discovered by
the furious Artemis, she is banished and further chastised by an irate Hera, who turns the hapless Callisto into a bear.
Amalthea -- Third of Jupiter's known satellites. In Greek myth, Amalthea is a nymph on Crete who nourished the
infant Zeus with honey and goat's milk.
Himalia -- Tenth of Jupiter's known satellites. In Greek myth, Himalia is a Cyprian nymph and one of Zeus' many
lovers. She bore him three sons.
Elara -- Twelfth of Jupiter's known satellites. In Greek myth, Elara is the daughter of King Orchomenus, and, you
guessed it, one of Zeus' call girls. In order to hide Elara from the ever-snooping Hera, Zeus hid her under the earth
where she gave birth to the giant Tityas.
Pasiphae -- Fifteenth of Jupiter's known satellites. In Greek myth, Pasiphae is the wife of King Minos, who
somewhat foolishly insulted Poseidon. The irritable god responded to the insult by instilling Pasiphae with the horny-hots
for a bull. Pasiphae got her bestiality on with the bull in question, and subsequently gave birth to the Minotaur.
Lysithea -- Eleventh of Jupiter's known satellites. In Greek myth, Lysithea is the daughter of Oceanus and yet
another of Zeus' numerous lovers.
Carme -- Fourteenth of Jupiter's known satellites. In Greek myth, Carme is the daughter of Euboulos and mother of
Britomartis, who she conceived with the ever-fertile Zeus.
Ananke -- Thirteenth of Jupiter's known satellites. In Greek myth, Ananke is the goddess of necessity and mother
of the Moirae (the three Fates) and Adrasteia (distributor of rewards and punishments).
Leda -- Ninth (and smallest) of Jupiter's known satellites. In Greek myth, Leda is the daughter of Thestius and
wife of Tyndareus, the king of Sparta. Home boy Zeus was out pimpin' and seduced Leda by taking the form of a beautiful
swan. Leda, consequently, laid an egg from which hatched the Dioscuri twins Castor and Pollux. With Zeus, Leda gave birth
to Helen of Troy, said to be the most beautiful woman in Greece; and with her husband Tyndareus she had Clytemnestra.
Oberon -- Fifteenth of Uranus' known satellites. In Shakespeare's Midsummer Night's Dream, Oberon is the King
of Fairies. Young lovers Lysander and Hermia run away into the forest to escape the meddling Demetrius, who, with the
blessing of Hermia's father, is after Hermia for himself. Demetrius follows the couple into the forest, followed by Helena,
his ex who wants to rekindle the flame. Oberon, meanwhile, is having a spat with his wife Titania and thinks it will be
funny if he sprinkles some magical love potion in her eyes, which will cause her to fall in love with the first thing she
sees when she wakes up. Oberon's still kind of a nice guy, though, so when he overhears the jilted Helena's sob story, he
orders his servant Puck to sprinkle some love potion into Demetrius's eyes as well. Puck screws up and gives the potion to
Lysander, who immediately dumps Hermia in favor of Helena. As much as Oberon enjoys the insanity, he ultimately straightens
things out with a bit of antidote and everyone lives happily ever after.
Ariel -- Twelfth of Uranus' known satellites. In Shakespeare's The Tempest, Ariel is a spirit freed from a tree
by Prospero, rightful Duke of Milan who was usurped from his throne and stranded on an island by his brother Antonio and the
King of Naples, Alonso. Ariel acts as Prospero's servant, aiding in his revenge against Antonio and Alonso who
inadvertently sail too close to the island where Prospero is stranded. In the end, Ariel is freed from servitude when
Prospero abandons his magic.
Umnbriel -- More commonly known as "Umbriel," it is the thirteenth of Uranus' known satellites. In Alexander Pope's
satirical poem The Rape of the Lock, Umbriel is the gnome who journeys to the Cave of Spleen to procure the "Force
of Female Lungs, Sighs, Sobs, and Passions, and the War of Tongues" and a vial of "fainting Fears, Soft Sorrows, melting
Griefs, and flowing Tears"... weapons with which the irate Belinda uses to mourn the loss of a lock of her precious hair,
which was stolen by Baron.
Miranda -- Eleventh of Uranus' known satellites. In Shakespeare's The Tempest, Miranda is the daughter of
Prospero, stranded on the same island with her father. When Prospero causes a storm that shipwrecks his old enemies on the
island, Ferdinand, son of Alonso, is separated and lured to Miranda by the singing of Ariel. Naturally, it's love at first
sight.
Puck -- Tenth of Uranus' known satellites. In Shakespeare's Midsummer Night's Dream, Puck is the servant of
Oberon. The impish Puck, under the orders of Oberon, sets out to sprinkle love potion in the eyes of a sleeping Demetrius.
He misses his mark and gets Lysander instead, causing a comedic romance crisis. "Lord, what fools these mortals be!"
Cordelia -- First of Uranus' known satellites. In Shakespeare's King Lear, Cordelia is the youngest daughter of
Lear, King of Britain. Lear divides his domain equally between his three daughters, and while the elder two gush with false
affection, Cordelia's reaction is understated and sincere. Lear is unimpressed with Cordelia's lack of pomp, and
disinherits her. She later hooks up with the King of France, while Lear is stripped of power by his scheming elder
daughters. Conflicts ensue, and though the fallen Lear is eventually reunited with his sole loving daughter Cordelia, the
two are taken captive by the English. Cordelia is hanged, and her father dies of sorrow shortly afterwards.
Ophelia -- Second of Uranus' known satellites. In Shakespeare's Hamlet, Ophelia is the lover of Hamlet, Prince
of Denmark. When Hamlet accidentally stabs Ophelia's father thinking that he is Claudius, his uncle and murderer of his
father the rightful king, Claudius concocts a plot to send Hamlet to England to be sentenced to death. Driven to the brink
by Hamlet's apparent mental deterioration and the death of her father, Ophelia drowns herself in a river.
Titania -- Fourteenth (and largest) of Uranus' known satellites. In Shakespeare's Midsummer Night's Dream,
Titania is the wife of Oberon and Queen of the Fairies. After an argument with her husband over a boy which she has taken
it upon herself to adopt, Titania falls victim to Oberon's love potion, which causes her to fall in love with the first
thing she sees upon awakening. The first thing she sees, much to the amusement of Oberon, is Bottom, who, under the spell
of Puck, has the head of a donkey.
Iapetus -- Seventeenth of Saturn's known satellites. In Greek myth, Iapetus is the son of Uranus and Gaia. With
his wife Clymene, he sires four children: Atlas, Menoetius, Prometheus, and Epimetheus.
Rhea -- Fourteenth of Saturn's known satellites. In Greek myth, Rhea is the daughter of Uranus and Gaia and mother
of the gods. With her brother Cronus, to whom she is wed, Rhea gave birth to Demeter, Hades, Hera, Hestia, Poseidon, and
our oversexed buddy Zeus.
Tethys -- Ninth of Saturn's known satellites. In Greek myth, Tethys was a female Titan and goddess of the sea.
She married her brother Oceanus and gave birth to over 3000 children who became the lakes and rivers of the world.
Titan -- Fifteenth (and largest) of Saturn's known satellites. In Greek myth, the Titans were a race of giants
considered to be the personification of the various forces of nature. The twelve Titans, children of Gaia and Uranus, are:
Cronus, Rhea, Iapetus, Themis, Oceanus, Tethys, Hyperion, Theia, Crius, Mnemosyne, Coeus, and Phoebe.
Dione -- Twelfth of Saturn's known satellites. In Greek myth, Dione, by the busy loins of Zeus, became the mother
of Aphrodite, goddess of love.
Mimas -- Seventh of Saturn's known satellites. In Greek myth, Mimas, son of Gaia, was one of the giants slain by
Heracles (Hercules).
Mag mania: As with the ship names, Mag names were also derived from mythology, this time of Hinduism:
Varuna -- In Hindu myth, Varuna was the supreme god preceding Indra. He was the keeper of rta, an all-encompassing
force representing cosmic order. Varuna was eventually usurped by Indra as supreme deity, and subsequently became god of
the oceans and rivers.
Mitra -- In Hindu myth, Mitra is the brother of Varuna and co-guardian of cosmic order. Good-natured and friendly
with humans, Mitra was viewed as the mediator between the gods and man.
Surya -- In Hindu myth, Surya is the deity who dwells in the body of the sun. He is the son of Indra, the sky god,
and dawn, who is also his wife.
Vayu -- In Hindu myth, Vayu is the god of wind.
Varaha -- In Hindu myth, Varaha is the avatar of Vishnu, represented as a boar. When the demon Hiranyaksha dragged
the earth into the depths of the ocean, Varaha battled to return the earth to the surface.
Kama -- In Hindu myth, Kama is the god of love, comparable to the Greek Eros, or Cupid.
Ushasu -- In Hindu mythos, Ushasu is the goddess of the dawn.
Apsaras -- In Hindu myth, Apsaras are female nature spirits, described as beautiful and seductive. They dance to
the music of Gandharvas, male spirits of the air, forest, and mountains.
Kumara -- In Hindu myth, the Kumaras are seven sons born out of the limbs of Brahma. They refused to procreate
the species and chose to remain Yogis, earning their name which means "virgin boy" in Sanskrit.
Kaitabha -- In Hindu myth, Kaitabha is one of the two demons who sprung forth from the ears of a sleeping Vishnu.
Along with Madhu, Kaitabha sought to kill Brahma, but Vishnu destroyed them before they could.
Tapas -- In Hinduism, "tapas" are ascetic meditations, roughly comparable to prayers.
Bhirava -- More commonly known as "Bhairava". In Hindu myth, Bhairava is a form Shiva was forced to take as
penance for cutting off one of Brahma's heads. In the form of Bhairava, Shiva became a wandering ascetic, using Brahma's
skull cap as a begging bowl.
Kalki -- In Hindu myth, Kalki is the tenth and final incarnation of Vishnu. Equivalent to the Christian "Second
Coming", Kalki will descend from heaven on a white horse to destroy the wicked and renew creation.
Rudra -- In ancient Vedic myth, Rudra is the malignant god of storm, wind, and death. With the emergence of Hinduism,
the perception of Rudra changed drastically. He became a beneficent god, and would eventually become known as Shiva.
Marutah -- In Hindu myth, the Marutahs were storm deities, sons of Rudra and attendants of Indra. The story goes
that their mother, Diti, wanted to give birth to a son who would rival Indra in power. To achieve this, she planned to
remain pregnant for a full century. Indra learned of this, and in order to foil her scheme, hurled a thunderbolt at her
womb while she was still pregnant. The fetus shattered, and thus the Marutahs were born.
Yaksa -- More commonly known as "Yaksha". In Hindu myth, Yakshas are semi-divine beings, half-god and half-demon.
They live beneath the Himalayas where they guard the treasures of the Earth.
Sita -- In Hindu myth, Sita is an incarnation of Lakshmi and wife of Rama, seventh incarnation of Vishnu. Sita
was abducted by the demon king Ravana and rescued by her husband.
Garuda -- In Hindu myth, Garuda is a fierce bird of prey, enemy of all snakes including the Nagas.
Nandin -- More commonly known as "Nandini". In Hindu myth, Nandini is the cow of plenty belonging to the sage
Vasishtha.
Ashvinau -- A very awkward translation of "Asvins". In Hindu myth, the Asvins are the twin sons of Saranyu and
Surya. They're known as the "divine physicians" and represent the morning and evening stars.
Ribhava -- Probably another awkward translation, this time of Rhibus. In Hindu myth, Rhibus are the craft gods,
equestrian and solar deities.
Soma -- In ancient Vedic myth, Soma is a sort of "chi" or lifeblood that flows through all living things. Vedic gods
gained their immortality through the consumption of Soma, and humans were also able to obtain it through the intoxicating
sap of the Soma plant. As the Vedic age ended, Soma was reduced to simply being god of the moon.
Ila -- There are a number of conflicting legends in Hindu mythology involving Ila, but most involve some sort of
frequent sex-changing. According to the Puranas, Manu Vaivaswata instituted a sacrifice to Mitra and Varuna to obtain a
son. However, the priest in charge of the sacrifice screwed it up, and Manu was instead blessed with the birth of a
daughter, Ila. Through the favor of Mitra and Varuna, her sex was changed and she became a man, Su-dyumna. Shiva cursed
Su-dyumna, whose gender was once again reversed to Ila. Later on, through the favor of Vishnu, Ila was transformed back
into Su-dyumna. No hot or cold water needed.
Durga -- In Hindu myth, Durga is a fierce form of Devi, created by all the other gods and embued with their
combined powers.
Vritra -- In Hindu myth, Vritra is among the most powerful of the asuras. He takes the form of a giant dragon or
serpent, and is said to be so huge that his coils surround mountains.
Namuci -- In Hindu myth, Namuci is, like Vritra, among the most powerful of the asuras. In the time of Indra's
attack on the asuras, Namuci resisted and was finally able to beat Indra. Indra was let go, but only after Namuci forced
him to swear that he would never again attack the asura by day or night, with wet or dry. Indra was able to defeat Namuci
by cutting off his head precisely at twilight with a column of foam from the ocean, considered neither wet or dry.
Sumba -- I was unable to find any connection to Hindu mythology, but the real-life Sumba is a small island in
Southeast Indonesia...
Naga -- In Hindu myth, Nagas are a race of half-human, half-snake deities whose duty is to protect springs, wells,
and rivers. They cause rain, and are thus worshipped as the bringers of fertility, but also of disasters such as floods
and drought. They are thought to live in the underground city of Bhogavati under the rule of Sesha.
Kabanda -- Have no clue. My research came up completely dry. If you possess knowledge regarding the mythos of
Kabanda, please feel free to share.
Ravana -- In Hindu myth, Ravana is the king of Ceylon and the Rakshas, evil spirits occasionally known to be
not-so-evil. The ten-headed demon king Ravana kidnaps Sita, and is subsequently killed by Rama, Sita's husband and seventh
incarnation of Vishnu.
Marica -- Probably a mistranslation of "Marici." In Hindu myth, Marici is chief of the maruts, one of the seven
sons of Brahma. (Incidentally, Marica, in Roman mythology, is an Italian nymph. She is said to have possessed a sacred
forest near Minturnae.)
Andhaka -- In Hindu myth, Andhaka is a demon born from a drop of Shiva's sweat. Andhaka develops an incestuous
lust for his mother, Parvati, and is subsequently slain by Shiva.
Bana -- In Hindu myth, Bana, or Banasura, was an Asura king and staunch devotee of Shiva. Shiva offered Bana a
boon for his devotion, and the oh-so-clever Bana asked Shiva to guard the gates of his city. Banasura's newfound arrogance
would ultimately lead to his downfall... when his daughter Usha saw a handsome prince in her dreams, the prince was
identified as Aniruddha, grandson of Krishna. The two were married without the king's knowledge, and when Bana found out,
he imprisoned Aniruddha. Krishna subsequently attacked Banasura's city, defeating Banasura himself.
Naraka -- In Hindu mythology and Buddhism, Naraka is the place of torture for evil souls. The Christian equivalent
would be hell, although Naraka consists of many different kinds of hells, both hot and cold.
Madhu -- In Hindu myth, Madhu is one of the two demons who sprung forth from the ears of a sleeping Vishnu.
Along with Kaitabha, Madhu sought to kill Brahma, but Vishnu destroyed them before they could.
Choose Your Weapon:
Gungnir -- In Norse myth, Gungnir, "Spear of Heaven", is big daddy Odin's weapon of choice. Gungnir's origin is
unknown... Odin found it on the Plains of Ida and used it to fashion Asgard as it is known today.
Gae Bolg -- In Celtic myth, Gae Bolg is the magical spear belonging to Lugh, god of the sun. Gae Bolg was handed down
to Lugh's son, Cuchulan, mightiest of the ancient Celtic heroes.
Durandal -- The Durandal is the sword said to have belonged to Roland, a commander of Charlemagne's army, which he won
from the giant Jutmundus. The sword had in its hilt a thread from the cloak of the Virgin Mary, a tooth from St. Peter, a
hair from St. Denys, and a drop of blood from St. Basil. The legend is that when Roland became mortally wounded, to
prevent the Durandal from falling into the hands of the Saracens, he threw it into a poisoned stream where it is to remain
forever.
Fire Scepter: Agni -- In ancient Vedic myth, Agni is the god of fire. He was also worshipped as the "spark of life",
and was thus connected to all living things. He was one of the most important gods to the ancient Indians - he had over
200 hymns addressed to him in the Rig Veda, and 8 of its 10 books begin with praises to him. In later times, worship of
Agni plummeted, and he became reduced to an incarnation of Shiva or Brahma.
Ice Staff: Dagon -- In ancient Mesopotamian myth, Dagon, meaning "corn", was the god of vegetation. He passed his
knowledge of farming to humans, allowing them to settle down and create history's earliest recorded non-nomadic
civilization, Mesopotamia. What this has to do with ice is anybody's guess.
Storm Wand: Indra -- In ancient Vedic myth, Indra was the supreme ruler of all the gods. He was the god of war, of
thunder and storms, and basically the ultimate badass force in the universe. He earned his position by defeating the asura
Vritra, who stole all the water in the world for himself. Indra was a great drinker of Soma, and while intoxicated, he
grew to gigantic proportions to battle his enemies... although usually he did it just to get drunk. As with other Vedic
gods, Indra lost much of his grandeur over the years, and was eventually reduced to god of weather.
Caduceus -- In Greek myth, the Caduceus is the wand of Hermes, messenger of the gods.
Written content and original graphics copyright © 1997-2006 Jared Matte. Screenshots thanks to Bo Bayles. Hosting and administration thanks to Nathan Tsui.
Phantasy Star characters, logos, and images are trademarks of SEGA Corporation. The GHZ is an independent fansite and is
not affiliated with SEGA Corporation.
|